
Do you want to create a WordPress website or blog in just seconds? That too with your dream domain free for one year. And do you want a hosting server with high quality at a low price?
Then DreamHost is the straight one to full fill all your needs. Just go through the article to learn how to create your dream WordPress site or blog in just 3 steps.
Earlier we have created the guides to create a WordPress blog using other hosting services like Bluehost, iPage, wordpress.com.
- Related: How To Make a WordPress blog with Bluehost
- How to Create a WordPress website using iPage
- How to create a free website using wordpress.com
3 Steps to Create A WordPress Website or Blog using DreamHost
The following are three steps needed to create your dream WordPress site using DreamHost.
- Research for domain and select the best.
- Choose DreamHost to register your domain and host your blog or website.
- A quick guide to creating your WordPress site or blog with DreamHost.
Step1: Research for domain and select the best
Before you start to build a website or blog, just keep in mind the following key points regarding the domain name.
- It should reflect the core idea of your website or blog.
- It should be shot enough to remember.
- It should be one of the most used keywords.
- It should be a straightforward target for your required area.
- It should not contain numbers and hyphens.
- It should be easy to spell.
- It should be easy to type.
Research over the web regarding your required domain name, to achieve all the above key points. After research, then pick the right name for your domain.
Step2: Choose DreamHost to register your domain and host your blog or website
Next, choose DreamHost to full the following:
- To officially register your domain over the web.
- To host your website or blog. That is, all your files are stored in the DreamHost server.
- To start your blog or website.
Why DreamHost?
In general, you need a hosting server to host your website or blog. Many website owners and experts suggest that DreamHost is the best hosting server. Because of the following reasons.
- It is officially recommended by wordpress.org.
- It provides quality hosting at the lowest prices.
- All its annual plans provide a free domain for one year. That is you can register your required domain without any cost.
- You can install WordPress on your site or blog in just seconds.
- It provides a free encrypted SSL certificate.
- All its servers are exclusively designed and optimized for WordPress.
- It provides 24/7 assistance.
Step3: Quick guide to creating your WordPress site or blog with DreamHost
3.1 Pick a DreamHost plan
- Go to the Dreamhost(Special Discounted Link) website.
- Choose a plan. Just like Shared Starter or Shared Unlimited.
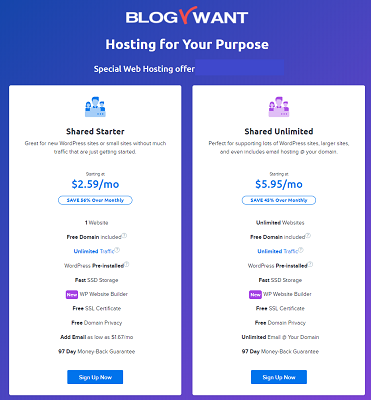
Next, click on the ‘Sign Up Now‘ button just below the plan. Then a new page opens.
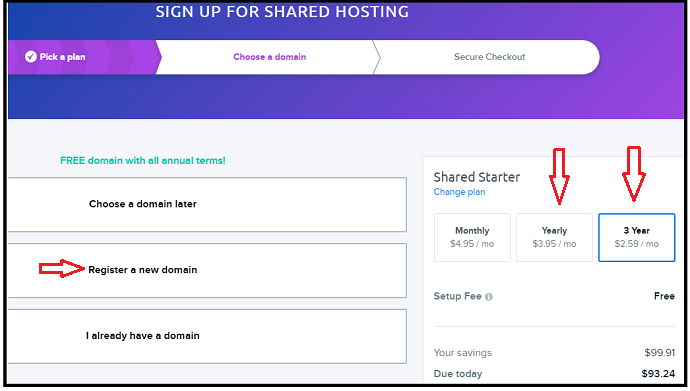
3.2 Choose your required domain
Next, just click on the Yearly or 3 Year plan. Here, don’t select the monthly plan. Because you won’t get your required domain free. And you will get the maximum discount with the 3 years plan.
Next, on the same page, just click on the option Register a new domain. Then a new page opens as shown below.
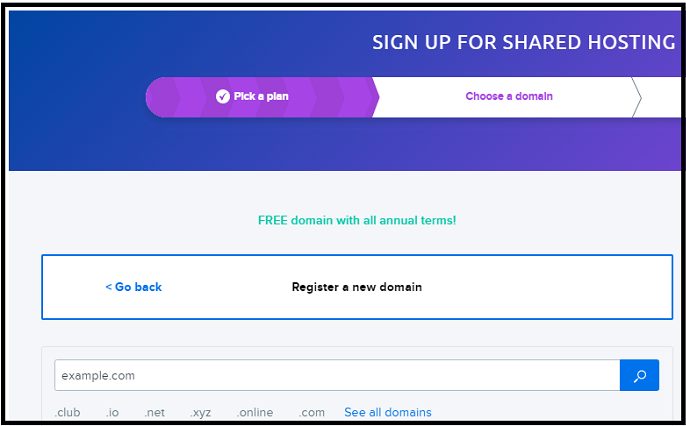
- Now, on the search bar, type your required domain name. And press the search button.
- Here I entered a domain like ‘mystudymaterials.com‘.
- Then the DreamHost searches for the existence of domain.
- If it exists, then a message is displayed like Congrats. mystudymaterials.com is available.
- Just beside this message, click on the button ‘ADD FOR $0.00’.
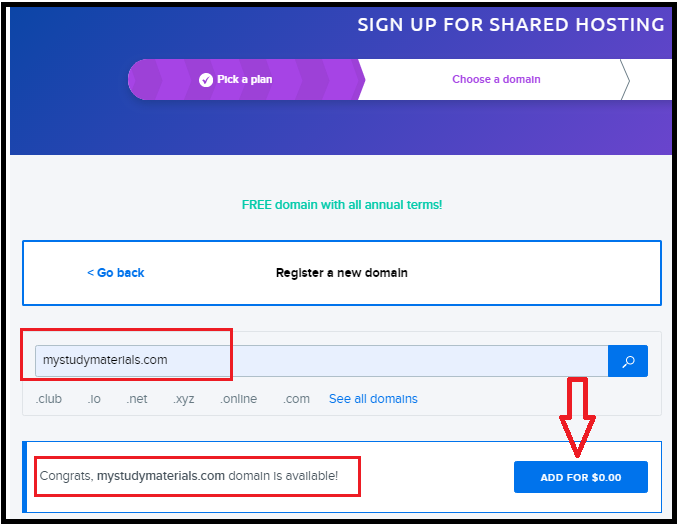
That’s it! You now have picked your required domain. That too free for one year.
3.3 Buy your selected plan
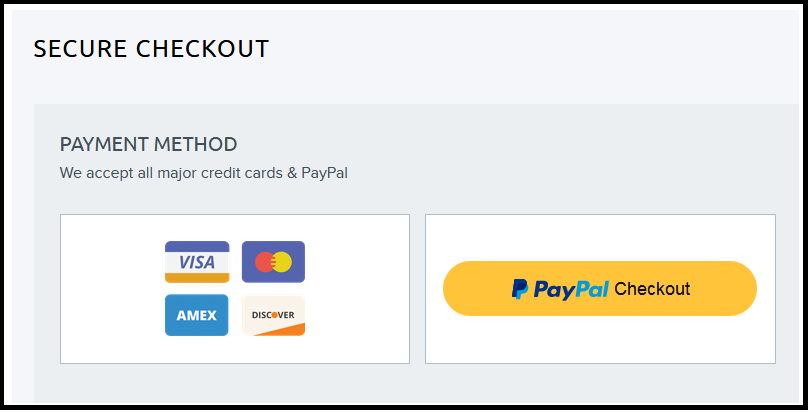
- Next, buy your selected plan with the two payment options.
- PayPal.
- Credit Card or Visa, Amex, and other bank-issued Cards.
- If you have a PayPal account, then continue the payment through that account.
- Otherwise, use any bank cards just like a credit card. And complete the payment process.
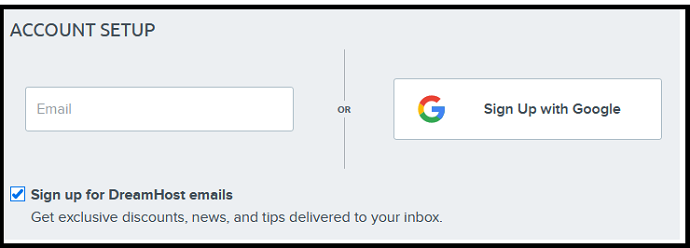
- Next, below the PAYMENT METHOD, you can see ACCOUNT SETUP.
- Here, you can enter your email address. Or you can Sign Up with Google. So that you can receive emails from the DreamHost.
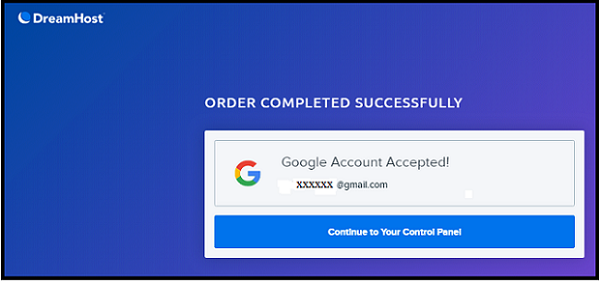
- Next, drag down the page below. And click on the button Submit Order.
- Then, a confirmation message is displayed regarding your order is completed.
- Now, just click on the button Continue to Your Control Panel.
3.4 Install WordPress
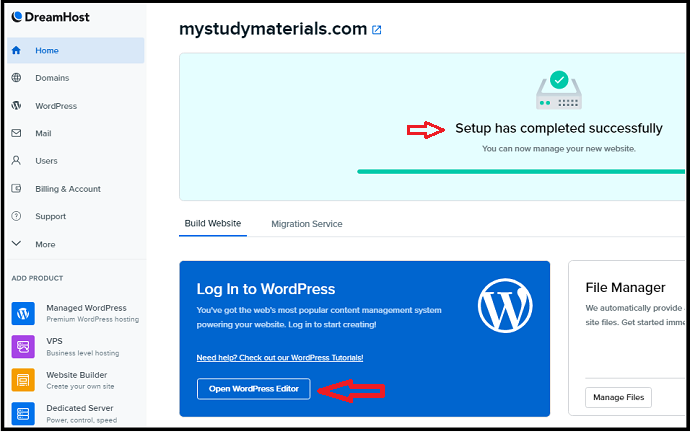
- You can now see the DreamHost control panel for your site.
- On this control panel page, just click on the Install WordPress.
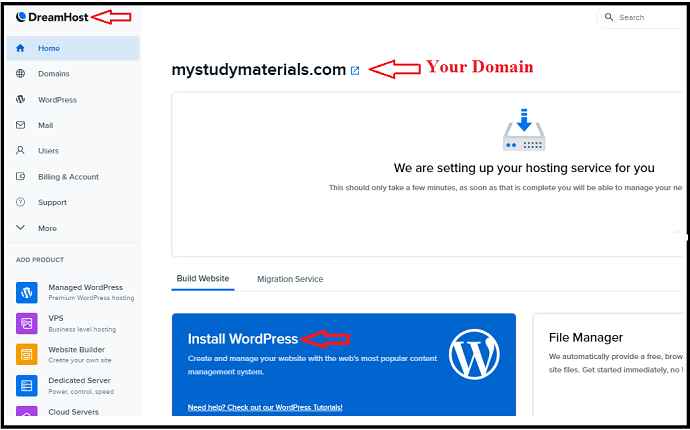
- Then WordPress starts installing on your site.
- Here, WordPress installation is completed in just seconds.
- Once this process is completed, just give a click on Open WordPress Editor.
3.5 Login to WordPress site and Customize it
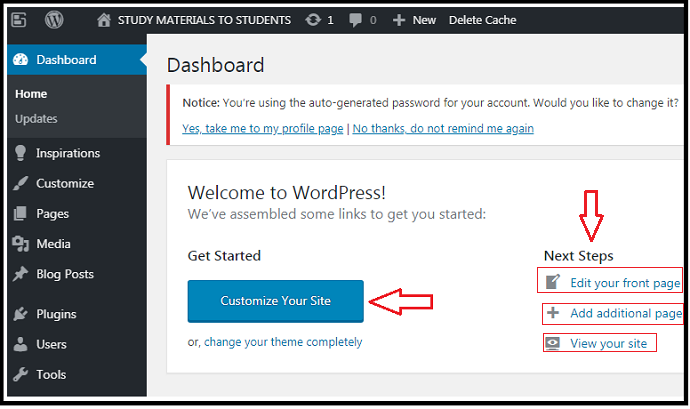
- Next, you can directly enter your WordPress website admin dashboard.
- That is you directly logged in to your WordPress site with an autogenerated password.
- And you can see the message Welcome to WordPress!
- That is your WordPress website is created successfully.
- If you want to change the password of your site, then you can click on the message Yes, take me to my profile page. And change your password.

- Next, you have to customize your WordPress site.
- For this, click on Dashboard and then on the Customize Your Site.
- In customization, do the following:
- Select the right theme that suits your site. We suggest Genesis theme Framework. We are using it on this blog and on our other blogs as well.
- Edit and change your front page.
- You can add additional pages too.
- After all, you can view your site.
- And go ahead with the right modifications to improve your WordPress site.
Conclusion
That’s it! You now have created your dream WordPress site with DreamHost. You must say thanks to DreamHost for making the complex task easy and quick. And you have acquired your dream domain free for one year.
Creating a website is not enough. After that, you need to do many things to get visitors to your site. We have given the complete guide on This blog post.
- Read Next topics to read: 2 ways to verify your website with Google webmaster tools
- 5 Steps to create a Google Analytics account
- What is SEO and how to use on a blog
I can confirm that this article guides you on how to create a WordPress website or blog using DreamHost in simple steps. If you like it, do a favor by sharing this article and follow BlogVwant on Facebook and Twitter for more tips.
Create A WordPress Website on DreamHost – FAQ
-
Does DreamHost offer cPanel?
No. However it provides a custom-built panel which is more instinctive and more comfortable to use than cPanel.
-
How do I automatically install WordPress?
Just log in and go to your DreamHost Control Panel. And click on the Install WordPress. Then WordPress starts installing. And the set up can be completed in just seconds.
-
Where are DreamHost servers located?
Currently, servers are located in the United States only. But these are accessible from anywhere.
-
How do I register a free domain?
To register your domain free for one year, you have to buy anyone annual or three-year plan of DreamHost. Just like Shared Starter and Shared Unlimited.
I just wanted to say that how impressive your article! Your blog is truly an expert at understanding trend dream host e-commerce. Organizing and structuring content on your e-Commerce website is very important, especially if you’re using WooCommerce on Dream Host. This ensures that your site is accessible for users, easy to navigate, and SEO-friendly, so that your visitors have the best experience. If you need guidance on how to place and structure content on your website, here are some tips. I also have a similar blog where I have explained about e-commerce, and on our website, We sell Shopify and WordPress themes and plugins at good rates, which can help you grow your website and improve its structure. If you want, you can definitely visit our website. Thank you!