
Do you want to know the complete details about DreamHost Webmail login and its usage? Do you want to know how to create and manage Email@YourDomainname offered by DreamHost and DreamHost Webmail settings?
Then go through this article which provides you a quick guide to create and manage Email@YourDomain using DreamHost.
Why choose DreamHost web hosting?
DreamHost (Special Discounted Link) is a leading hosting service provider in the hosting industry for more than 20 years.
- It is officially endorsed by WordPress.org on its official webpage.
- It guarantees 100% Uptime.
- All of its plans except Shared Starter offers unlimited free emails@yourdomainname.
- All of its 12 or 24 or 36 months plans offer free domain name too.
- It provides a free SSL certificate too.
- It provides more features at affordable prices.
- And more.
So you can use it for your site.
In this article you can learn:
- How to create your EmailAccounts@YourDomainname offered by DreamHost?
- How to Login your Email@YourDomainname using DreamHost’s Webmail?
- How to manage your Email@YourDomainname using DreamHost’s Webmail?
- How to change the passwords of your users’ Email@yourdomainname using DreamHost Panel?
Let’s have a glance at each one step by step.
- You Might Like: DreamHost Review: Is DreamHost a Good Web Host?
- 3 Steps to Create A WordPress Website with Dreamhost
1. How to create EmailAccounts@YourDomainname offered by DreamHost?
DreamHost offers unlimited emailaccounts@yourdomain. It takes a few steps to create your email.
1.1 Prerequisites to create email@yourdomain using DreamHost
- You must have purchased:
- DreamHost’s plans.
- Or DreamHost’s paid email plan.
- All of DreamHost’s plans offer unlimited free emailaccounts@yourdomain except its Shared Starter plan.
- Suppose if you have purchased its Shared Starter plan. Then you have to buy its Email Hosting plan. Then only you can get unlimited free emailaccounts@yourdomain.
1.2 Step by Step Procedure to Create email@yourdomainname using the DreamHost Panel:
Step1: Log into your DreamHost panel. Next, open the Manage Email page.
Step2: Next, click on Create New Email Address button. Then you can view:

Step3: Next enter the following:
- Your desired email address in the first field.
- Next in the third field, choose your domain to add it to your email address from the dropdown list.
- Next, enter the name for whom you created the email address. As this is your first email, you can your name. Or enter the name as admin. Because you are the admin of your site.
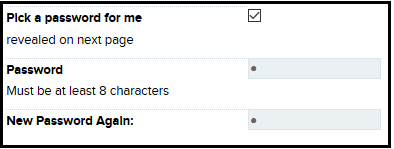
Step4: Next, click on the checkbox beside ‘Pick a password for me’. Then the password will be generated for you. Or you can enter your own password.
Step5: Next, you can view several other fields like:
- ‘Limit total disk usage’ and
- ‘Remove read messages’
But there is no need to adjust these to create an email address. So avoid adjusting these fields.
Step5: Next, click on the Create Address button. Then a Success Message appears confirming that your desired email address has been created.
That’s it! You have now created your first email@yourdomain using DreamHost Panel. You can repeat the above steps to create the email addresses@yourdomainname for your employees or anyone.
2. How to Login your Email@YourDomainname using DreamHost Webmail login?
2.1 What is Webmail?
- Webmail is an easy path to send and receive emails from a web browser, instead of an email client.
- All emails travel over the internet and are stored on servers. Those servers can belong to:
- Email providers (like Gmail),
- Internet service providers (like Comcast),
- Or Web hosting providers (like DreamHost).
- These servers collect your email messages and store them until you delete them.
So you can view and manage your email@yourdomainname using webmail.
2.2 How to Access Webmail using DreamHost URL?
2.2.1 Earlier Method to Access Webmail using ‘atmail’ (Outdated).
- In the past, you can log into your webmail using https://atmail.example.com. Here example.com is your website.
- But due to improvements with DreamHost’s email infrastructure, you should no longer use this URL to connect to Webmail.
2.2.2 New Method to Access Webmail using DreamHost Webmail login URL (Highly Recommended)
- DreamHost highly recommends the following its URL to connect to your webmail account.
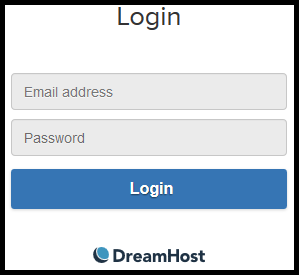
https://webmail.dreamhost.com - Use the above URL and login to your Webmail account.
- Webmail is automatically configured to connect to the DreamHost mail server.
- The only credentials you must enter here are your email address and password.
- Here the password is the same as you have created previously using the DreamHost panel.
Recommended: DreamHost Vs Bluehost: Comparison between Two Big Titans in Hosting Industry
3. How to manage your Email account using DreamHost Webmail Settings?
After login to your webmail account, then you have to learn the following:
- How to check new mails?
- How to change your TimeZone?
- How to attach a file?
- How to filter emails into the Spam folder?
- How to Delete emails?
- How to add and delete a contact?
- How to add an image to the contact?
- How to add a group?
- How to Export and Import contacts?
- How to create a signature?
3.1 How to check new mails?
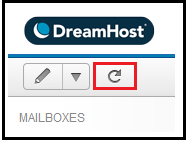
- Webmail, by default, does not automatically check for new mails if you leave it open.
- But you can check new mails manually. For this, just click the refresh button near the top left.
3.2 How to Change the TimeZone?
- Webmail defaults to the server’s timezone.
- If you want you can change it to your local time.
- Just follow the below steps to change your timezone.
Step1: Login to Webmail using the DreamHost URL https://webmail.dreamhost.com
Step2: Next, click on the Settings tab on the top.
Step3: Next, scroll towards the bottom. Then you can view the option ‘Timezone’.
Step4: Now beside it, click on the dropdown list. And select your desired Timezone.
Step5: Next, click on the Save Settings button at the bottom of the page.
3.3 How to attach a file?
- When you are composing or creating an email if you want to attach any file. Then click the button Attach from Computer, which is present at the bottom right side.
- Webmail is a PHP application. And it supports the maximum file size of 40MB to upload.
3.4 How to filter emails into the Spam folder?
- In Webmail, by default, Vade anti-spam filters control the Spam Folder for all the DreamHost addresses.
- But if you find email is filtered incorrectly or not filtered. Then you can use the Blacklist/Whitelist feature in your DreamHost panel to control this.
- Further, if you want to tag specific emails as Spam. Then follow the below steps.
Step1: In your Inbox, just give a right-click on your desired email.
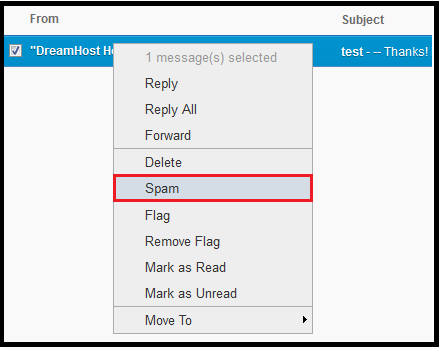
Step2: Next, select Spam from the drop-down list.
If you now check your Spam folder, then this spam email appears in it. And in the future, all messages from this spam email caught in the Spam folder.
3.5 How to Delete emails?
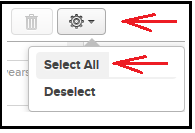
Step1: Click on the first gear icon in the top menu bar.
Step2: Next, click the Select All option. Then all emails on the page are highlighted in blue.
Step3: Next, click on the trashcan icon to delete them.
3.6 How to add and delete contacts?
3.6.1 How to Add a Contact
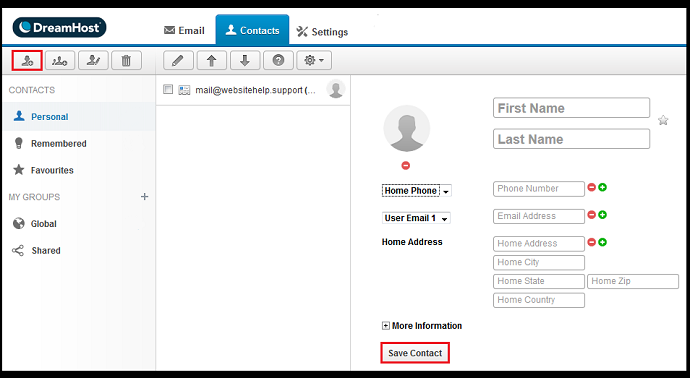
Step1: Click on the New Contact button on the top left.
Step2: Next, fill the contact details in the right pane.
Step3: After filling all the details, then click on the Save Contact button.
3.6.2 How to Delete a Contact
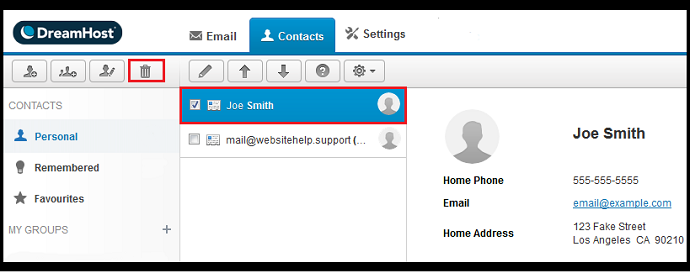
Step1: First, highlight the contact that you want to delete.
Step2: Next, ensure that the Checkbox is checked. That is, ensure that the tick mark is there in the Checkbox.
Step3: Next, click on the trashcan icon to delete it.
3.7 How to add an image to the contact
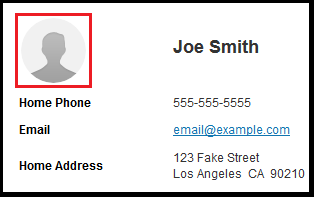
- To add an image to a contact, just click on the silhouette icon beside it.
- Next, browse your computer for the contact image. Then select it.
- Next, save it.
3.8 How to add a group
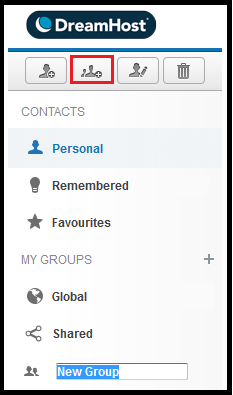
Step1: Click on the New Group icon on the top left.
Step2: Next, enter the group name.
Step3: Now, if you want, you can drag & drop your contacts in this group.
3.9 How to Export and Import contacts
3.9.1 How to Export Contacts
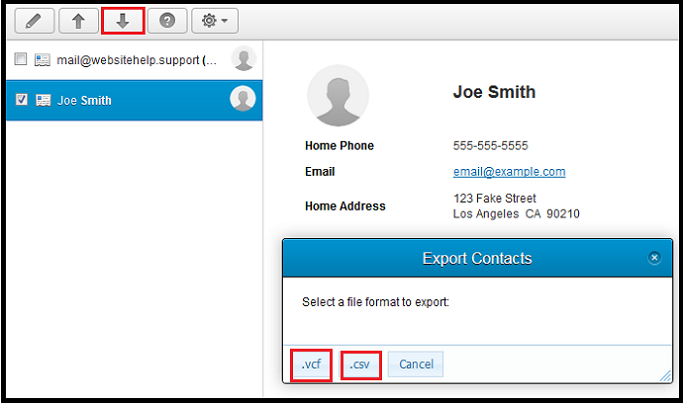
Step1: Select the Contacts that you want to export.
Step2: Next, click on the Export icon on the top left.
Step3: Next, select the file format .vcf or .csv. Then your selected contacts are exported and saved on your computer in the form of .vcf or .csv file format.
3.9.2 How to Import Contacts
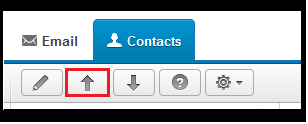
- Click on the Import icon on the top left.
- Next, browse and select the contacts file on your computer.
- Remember that the file which is to be imported must be in .vcf format.
3.10 How to create a signature
- Click on the Settings, in the top menu bar.
- Next, you can see the Signature section at the bottom of the settings page.
- Next, type in text here and upload it as an image.
Read It: HostPapa Review: Best Linux Web Hosting Service for Your Small Business
4. How to change DreamHost Webmail password?
Step1: On your DreamHost panel, open the Manage Email page.
Step2: Next, click on the Edit button to the right of your email address.
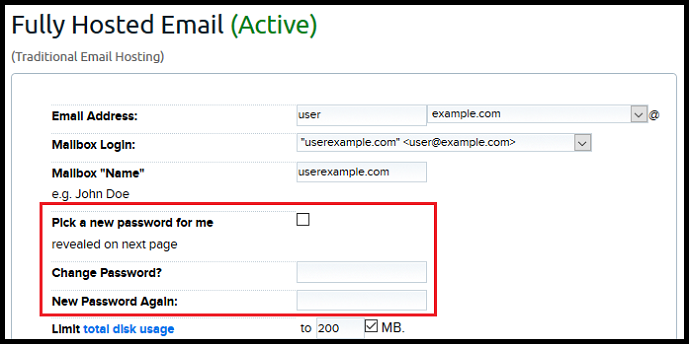
Step3: Now you can see the two options to create a new password.
- The first option is, let’s allow the system to pick the new password for you. To perform this task, click the checkbox of Pick a new password for me.
- The second option is, you have to choose your own password. And enter it twice.
Step4: Next, click on the Save Changes button. Then your new password will be changed.
In the above, if you have selected the checkbox of Pick a new password for me. Then the new password generated by the system will be displayed on the next page.
Conclusion
Now you have realized that DreamHost not only provides the best hosting for your website but also for emails@yourdomainname. Further, DreamHost’s webmail is easy to use as Gmail. And with this, you can manage emails@yourdomainname instantly.
- Read Next: Top 13 Best Affiliate Programs You Must Join Today To Boost Your Blog Revenue
- Top 6 Best Managed WordPress Hosting Services
I believe that this article definitely aids you to create and manage emails@yourdomainname using DreamHost Webmail login. If you like this article, do a favor by sharing this article and follow BlogVwant on Facebook and Twitter for more tips.
Additional Information about DreamHost Webmail Login
-
What is the maximum upload size for webmail offered by DreamHost?
Using Webmail, you can upload an attachment that has a maximum size of 40MB.
-
Is there a charge for DreamHost’s Webmail?
No. But you have to purchase any of DreamHost hosting plans to access Webmail.
-
Can I remove the DreamHost logo from webmail?
No. Currently, there is no option to remove the DreamHost logo from Webmail
-
Can I use HTML to embed an image in DreamHost’s Webmail?
No. The only way to append an image is to create a new email. And then click the image icon.