
Want to know about an automation testing tool Selenium? This article will give you complete information about Selenium Automation Testing and how to use Selenium for website automation testing.
What is Selenium?
When we talk about Automation Testing, the one thing that we always talk about is none other than Selenium automation testing. As an automation framework or automation testing tool, Selenium can be used to perform any type of automated web interaction. When it was developed, even the original intent and focus was to provide help in website automation testing. With the help of Selenium, you can run automated scripts to perform automatic actions on your website across different browsers.
Because of the various advantages that Selenium offers, many companies are using it for automating their testing process, reducing manual efforts, saving time, and managing in-house infrastructure since its launch in 2004. Initially, it was used to automate the local browsers but the testers always needed more to make the best out of Selenium. Nowadays, several online Selenium grids are available that help you perform automated cross-browser testing of your website or web app on the cloud with the help of Cloud Grid. In this article, I am going to brief you step-by-step process of how you can use Selenium to test your website on your local browsers as well as on a cloud grid.
But, before we move ahead, let’s understand Selenium a bit more.
Types of Selenium Tools
Selenium is in itself a set of many tools with different perspectives for test automation which goes by the name Selenium Suite of tools. Each tool has its own unique characteristics and use. Following are the four important components of Selenium Suite.
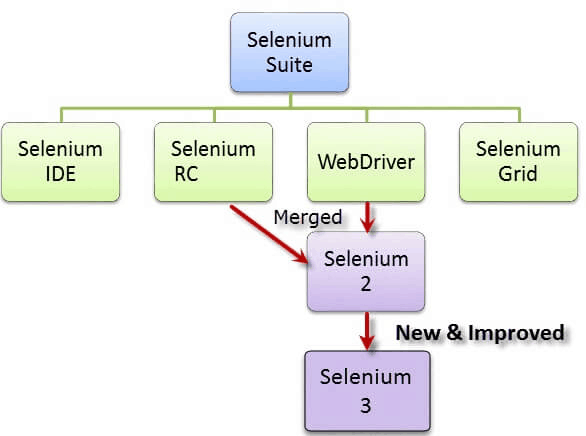
1. Selenium RC (Remote Control)
Selenium Core was the first Selenium tool in the Selenium Suite of tools. However, it was deprecated as it had some issues due to cross-domain testing because of the same origin policy. So, to overcome that Selenium RC or Selenium Remote Control was introduced after Selenium core. Selenium RC turned out as an aid to the cross-domain issue. Selenium RC has an HTTP proxy server which helps in fooling the browser to believe that both the Selenium core and Web app that are being tested are from the same domain hence removing the cross-domain issue.
Selenium RC is divided into two parts which help in overcoming the cross-domain issue:
- Selenium Remote Server
- Selenium Remote Client
However, the major issue with Selenium RC was the time taken to execute a test. As the Selenium server communicates using HTTP requests hence it was more time-consuming. Because of this limitation, Selenium RC also is not much in use.
2. Selenium IDE
Selenium IDE, earlier known as Selenium recorder, is a tool used to record, edit, debug, and replay functional tests. Selenium IDE is implemented as an extension to the Chrome browser and an add-on in the Firefox browser. With the Selenium IDE plugin, you can record and export tests in any of Selenium-supported programming languages like Ruby, Java, PHP, Javascript, etc.
3. Selenium Grid
Selenium Grid is based on Hub-node architecture. With Selenium Grid, you can run parallel test sessions across different browsers. Hub controls Selenium scripts running on different nodes(specific browsers inside an OS) and test scripts running on different nodes can be written in any programming language.
Selenium Grid was used with RC to test multiple tests on remote machines. Nowadays, as people find Webdriver better than RC, Grid works with both Webdriver and RC.
4. Selenium Webdriver
Selenium Webdriver is an enhanced version of Selenium RC and the most used Selenium tool. It accepts commands via client API and sends them to browsers. Simply put, selenium Webdriver is a browser-specific driver that helps in accessing and launching different browsers. It provides an interface to write and run Selenium scripts. Every browser has different drivers to run tests.
- Mozilla Firefox uses Firefox Driver (Gecko Driver)
- Google Chrome uses Chrome Driver
- Internet Explorer uses Internet Explorer Driver
- Opera uses Opera Driver
- Safari uses Safari Driver and
- HTM Unit Driver used to simulate browsers using headless browser HtmlUnit
5. Selenium Client API
It is the latest tool in the Selenium Suite of tools. With Selenium Client API you can write test scripts in various programming languages instead of writing test scripts in Selenese. Selenium client API is available for Java, JavaScript, C#, Ruby, and Python. These scripts can communicate with Selenium with predefined commands and functions of Client API.
Selenium WebDriver Architecture
As we’ll be using Selenium WebDriver further to execute our test cases we will focus on Selenium WebDriver.To make the complete process understandable on a very simple level, Selenium WebDriver Architecture consists of:
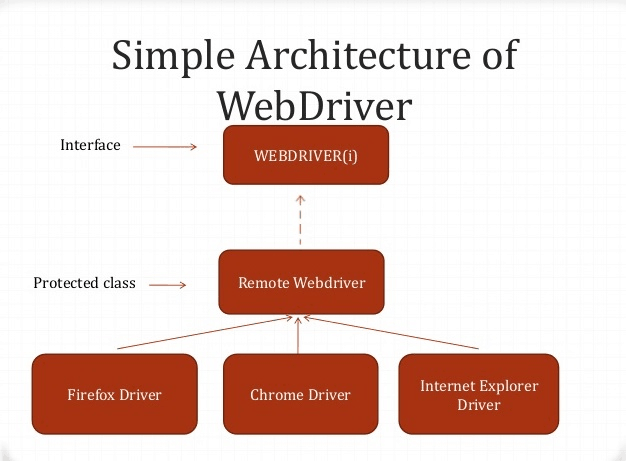
Basically, the Selenium web driver works in three layers Browser Driver, Remote Driver, and Language Bindings.
Core components of WebDriver Architecture:-
- Selenium Client Library / Language Bindings
Selenium bindings / Client libraries are created by Selenium developers to support multiple programming languages. For instance, if you want to use the browser driver in Python, use the Python bindings. You can check out and download all Selenium bindings on the Selenium Website.
- JSON Wire Protocol over HTTP
JavaScript Object Notation is used to transfer data between a server and a client on the web. With JSON, it is very easy to write and read data with data structures like Array and Object support. This wire protocol provides a transport mechanism and defines a RESTful web service using JSON over HTTP.
- Browser Drivers
Each browser has specific browser drivers to accept commands from the server and send them to the browser without leaking any internal logic of browser functionalities. Browser drivers are also specific to programming languages like Ruby, C#, Java, etc for web automation.
Following are the steps when we run any test script using Webdriver:
- HTTP request gets generated for every Selenium command and sent to the browser driver.
- Specific browser driver receives the HTTP request through HTTP servers.
- HTTP Server sends all the steps to perform functions that are executed on the browser.
- The Test execution report is sent back to the server and the HTTP server sends it back to the Automation script.
- Browsers
Selenium Webdriver supports all the major browsers like Google Chrome, Mozilla Firefox, Internet Explorer, and Safari browsers.
Live Working Selenium Example
To understand how Selenium WebDriver works and how we can automate a cross-browser web testing process using Selenium WebDriver, let’s take a live example and run the live code.
Prerequisites
To start with the automation process, we need a few software and toolkits installed beforehand which helps in the smooth running of the code.
Note: We’ll be using the IntelliJ code editor for writing the Selenium script.
- Download and install Java Runtime Environment
- Download Java Development Kit
- Download and install all Java Selenium Files (Selenium Server Standalone)
- Install Browser-Specific Drivers (In this blog, I’ll perform Automation on Chrome, so Chrome Driver for this case)
Also, you must have a basic knowledge of HTML, CSS, and Javascript to find web elements and Xpaths. However, if you are still new to this, you can go through the following documentation by W3C schools for HTML, CSS, and Javascript.
Also, you need to have a Knowledge of setting up the environment in the local system.
Steps of Running Selenium Automation Testing
Let’s see a detailed step-by-step execution of a test code in which we’ll help you run a Selenium Code written in Java language. This code will launch a website here, find the “Feature” element, click on the Feature button, then go to the login page by finding “Login”. After that will enter the credentials to the login page click the login button and be redirected to the LambdaTest dashboard. This Selenium script will run in the local browser, Chrome by using Chrome WebDriver and IntelliJ IDE.
Running Selenium Test Script in the local browser
Here is the script that we’ll run to automate the testing process on our local Chrome browser. Since we are using IntelliJ as our code editor, we’ll write the same in IntelliJ.
Selenium Script
import org.openqa.selenium.By;
import org.openqa.selenium.WebDriver;
import org.openqa.selenium.WebElement;
import org.openqa.selenium.chrome.ChromeDriver;
public class TestSelenium {
public static void main(String[] args){
System.setProperty(“webdriver.chrome.driver”,”C:\\Users\\Admin\\Desktop\\LTAutomation\\chromedriver_win32\\chromedriver.exe”);
WebDriver driver= new ChromeDriver();
driver.get(“http://www.lambdatest.com”);
try {
WebElement live = driver.findElement(By.xpath(“//*[@id=\”bs-example-navbar-collapse-1\”]/ul/li[2]/a”));
live.click();
WebElement pricing = driver.findElement(By.xpath(“//*[@id=\”bs-example-navbar-collapse-1\”]/ul/li[4]/a”));
pricing.click();
WebElement login = driver.findElement(By.xpath(“//*[@id=\”bs-example-navbar-collapse-1\”]/ul/li[6]/a”));
login.click();
String windowHandle = driver.getWindowHandle();
WebElement TextBox = driver.findElement(By.xpath(“//*[@id=\”app\”]/section/form/div/div/input[1]”));
TextBox.sendKeys(“sparshjohri1996@gmail.com”);
WebElement Password = driver.findElement(By.xpath(“//*[@id=\”app\”]/section/form/div/div/input[2]”));
Password.sendKeys(“sparsh@123”);
WebElement proceed = driver.findElement(By.xpath(“//*[@id=\”app\”]/section/form/div/div/button”));
proceed.click();
}
catch (Exception e) {
System.out.println(e.getMessage());
}
}
}
After feeding in the code, you’ll need to run the following test.
Run Test:
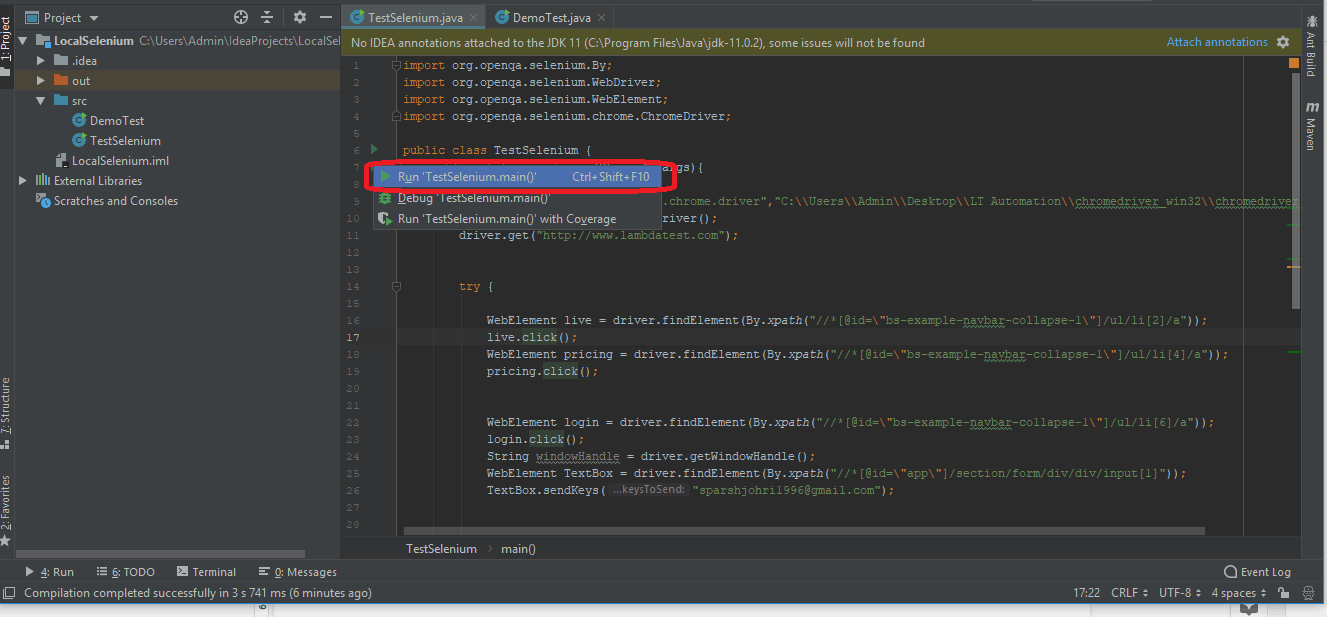
Result:
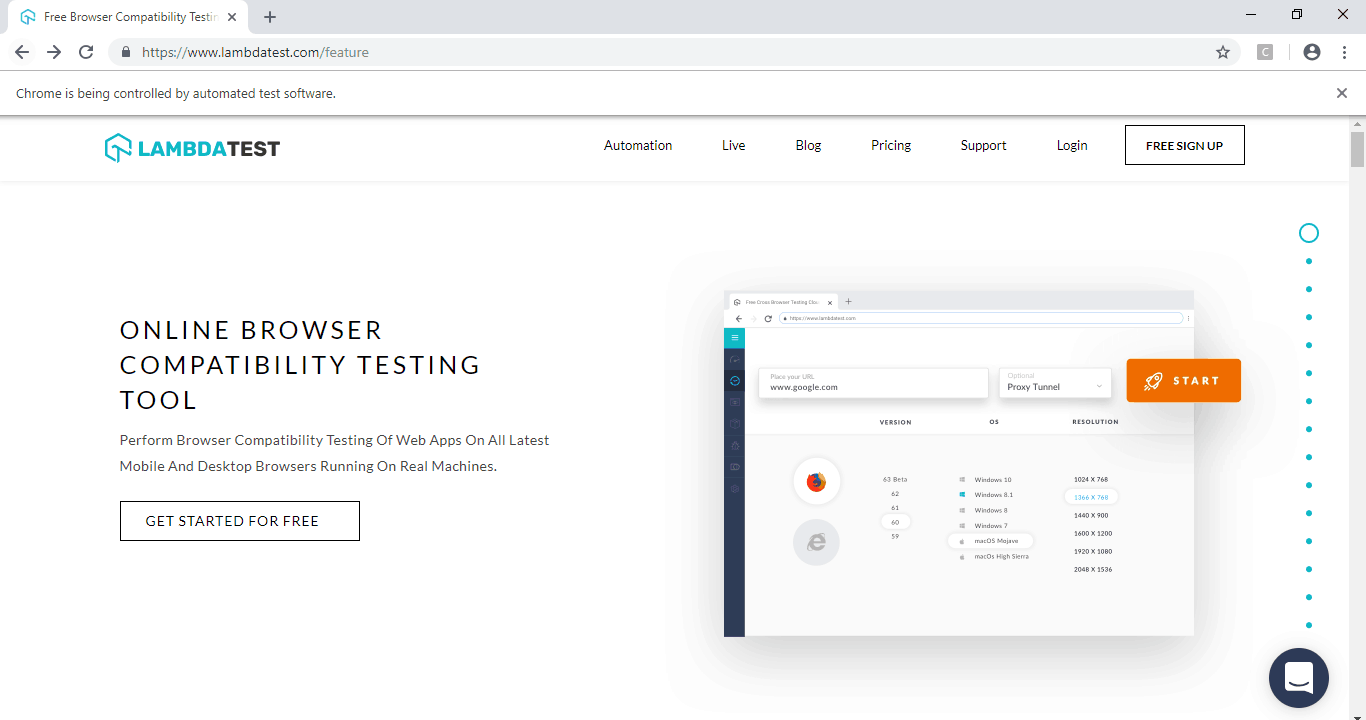
After you use the following code and run the same, you’ll see your Chrome browser being handled by the automation software.
The Chrome browser will first open the LambdaTest Website in your local browser.
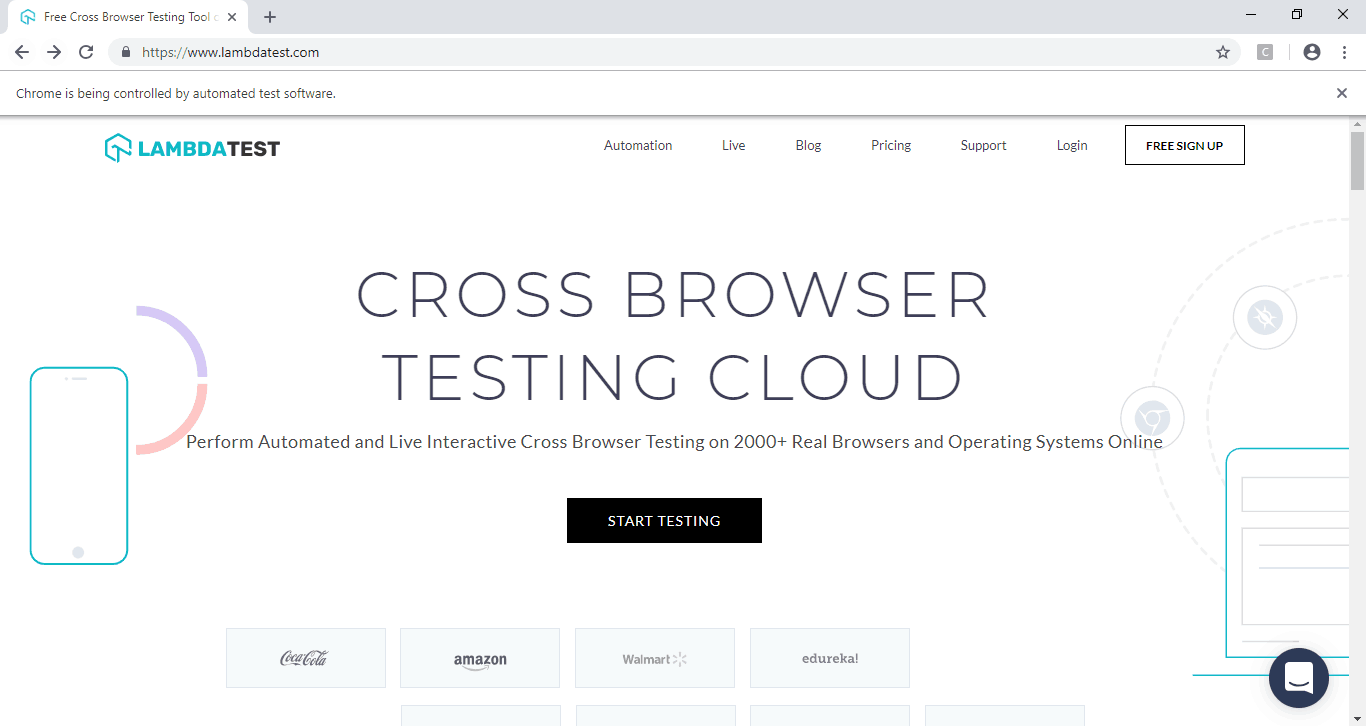
After that, as specified by the code, the Feature click event will be fired up. The code will search for the “Feature tab” and click on it. It will open up the feature page.
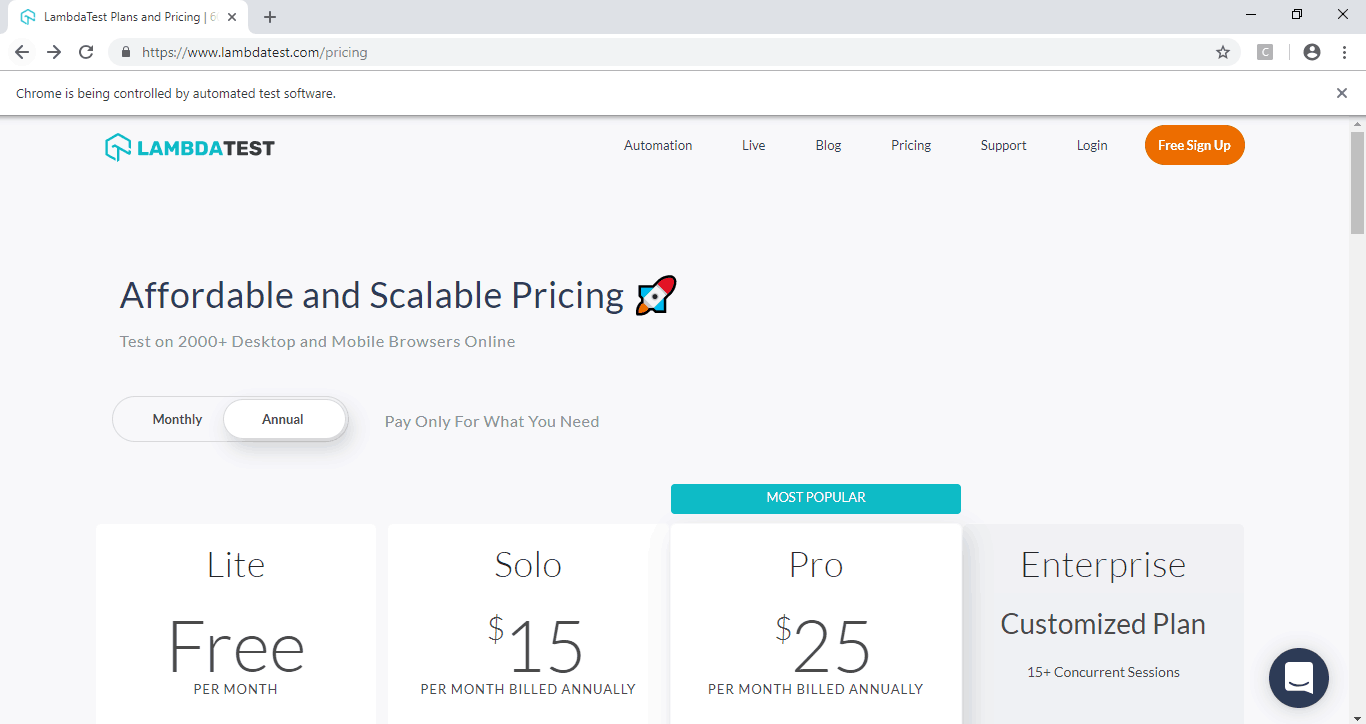
As guided by the script, the automation software will now find for pricing page element and will click on the “Pricing” page.
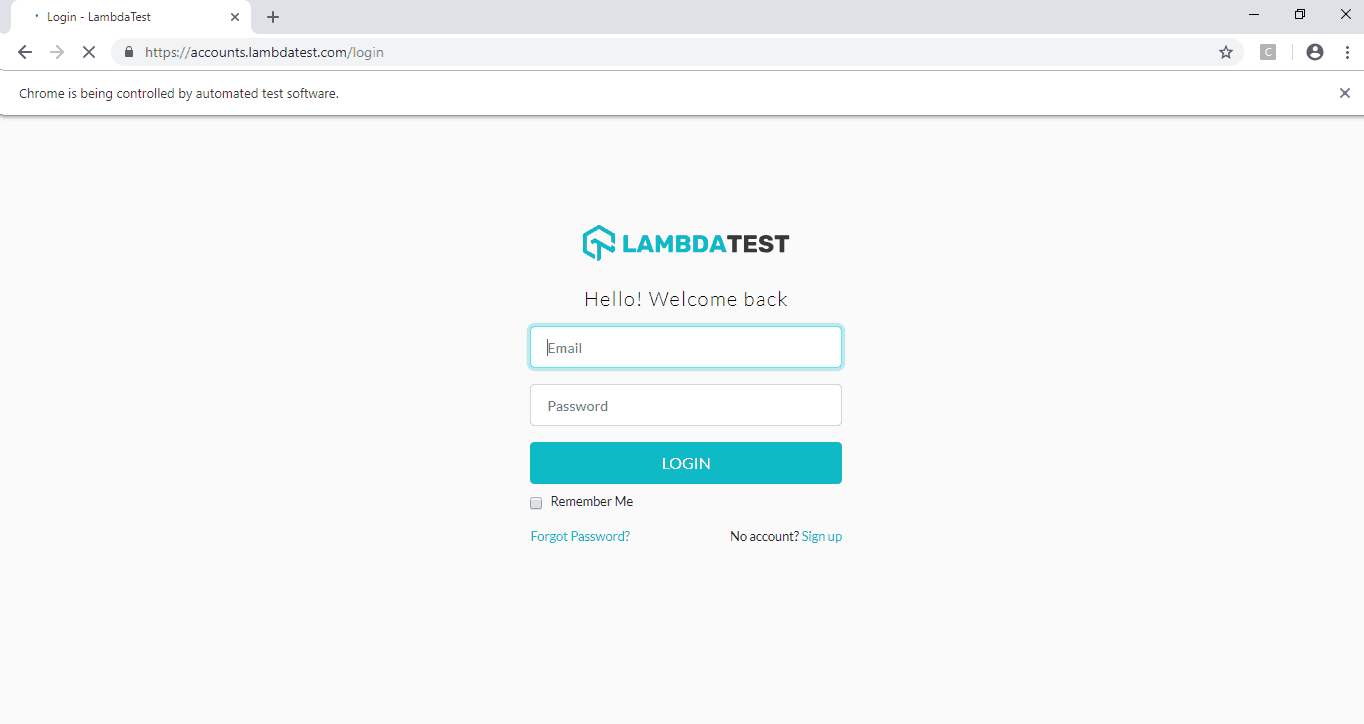
Again, the automation process will now find the login element and click on the Login page
The next step is to fill in the Login details as mentioned in the code.
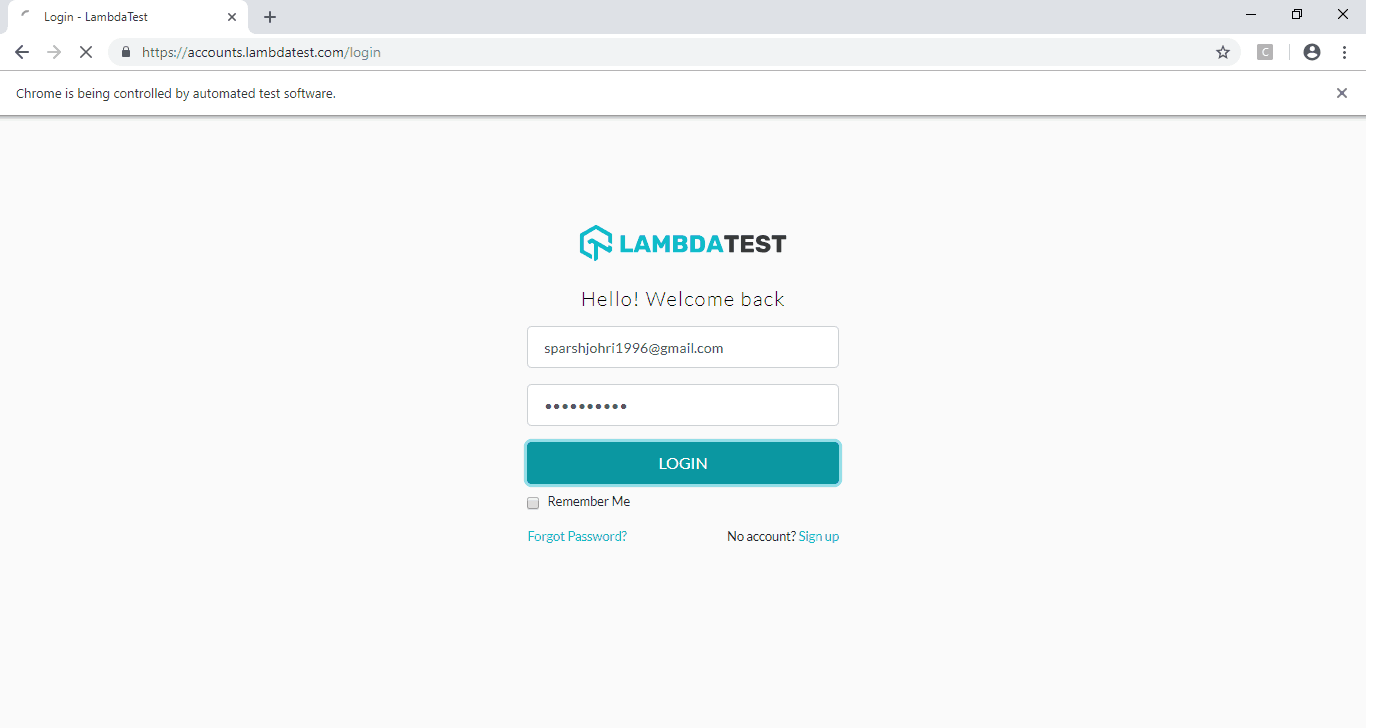
After filling in the login details the automation code will now prompt the software to open the dashboard as you can see in the image below.

Once these steps are processed, the code will then terminate and force the browser to get close. And you’ll see a successful execution of the automation code on your machine. Similarly, you can also run the code for Firefox browser, Internet Explorer browser, Opera browser, and Safari browser and test your website in an automated environment.
Running Selenium Test Script on LambdaTest
This script was used to automate the testing in your local browser. However, if you plan to test the same across hundreds of browsers and browser versions, the major disadvantage that you’ll face is to install these browsers in your local system.
Also, if you have the latest browser version installed on your desktop, you cannot install the older versions so it becomes almost impossible to test on Firefox 45 and Firefox 62 in the same machine. To help with this, you can make use of a cloud grid which provides thousands of browsers, browser versions, and Operating system combinations in the cloud. One such tool is LambdaTest. LambdaTest provides you a cloud selenium grid of thousands of browsers. So you can just select which browser versions you need to test and write the script. LambdaTest cloud grid will help you perform testing on these browsers on the Cloud.
Selenium script to run on the LambdaTest Platform
Running Selenium script on the LambdaTest platform is no different. You just need to make a few modifications to the same. You’ll need to append a username, access key, and desired capabilities to the existing Selenium script.
These are the elements you can easily find if you sign up for the LambdaTest platform.
Desired capabilities include all the information like Build name, Test name, Browser, Browser version, and Operating system on which script will run. It also includes the resolution of the screen and the capability to add test logs. You can very easily get the code for the same with the help of LambdaTest Capability Generator and just append the same in your code.
Note: Our readers get a special 20% discount on LambdaTest annual plans using coupon code: VWANT20.
The script that I am using here as a test script will again launch a website(here www.lambdatest.com), find the “Feature” element, click on the Feature button, then go to the Pricing page by clicking on “Pricing Element”. Then click on the “Login button”. After that enter the credentials to the login page and click on the login button. Then it will redirect to the LambdaTest dashboard.
So, let’s get going. Add the following code in IntelliJ:
import java.net.MalformedURLException;
import java.net.URL;
import org.openqa.selenium.By;
import org.openqa.selenium.JavascriptExecutor;
import org.openqa.selenium.WebElement;
import org.openqa.selenium.remote.DesiredCapabilities;
import org.openqa.selenium.remote.RemoteWebDriver;
public class DemoTest {
String username = “sparshjohri1996”;
String accesskey = “dYj7dNvDSOx4W1zpGqgcTIlKneU51B9d9zsBk97q1f1wPjeJ39”;
static RemoteWebDriver driver = null;
String gridURL = “@hub.lambdatest.com/wd/hub”;
boolean status = false;
public static void main(String[] args) {
new DemoTest().test();
}
public void test() {
setUp();
try {
driver.get(“https://www.lambdatest.com/”);
WebElement live = driver.findElement(By.xpath(“//*[@id=\”bs-example-navbar-collapse-1\”]/ul/li[2]/a”));
live.click();
WebElement pricing = driver.findElement(By.xpath(“//*[@id=\”bs-example-navbar-collapse-1\”]/ul/li[4]/a”));
pricing.click();
WebElement login = driver.findElement(By.xpath(“//*[@id=\”bs-example-navbar-collapse-1\”]/ul/li[6]/a”));
login.click();
String windowHandle = driver.getWindowHandle();
WebElement TextBox = driver.findElement(By.xpath(“//*[@id=\”app\”]/section/form/div/div/input[1]”));
TextBox.sendKeys(“sparshjohri1996@gmail.com”);
WebElement Password = driver.findElement(By.xpath(“//*[@id=\”app\”]/section/form/div/div/input[2]”));
Password.sendKeys(“sparsh@123”);
WebElement proceed = driver.findElement(By.xpath(“//*[@id=\”app\”]/section/form/div/div/button”));
proceed.click();
} catch (Exception e) {
System.out.println(e.getMessage());
} finally {
tearDown();
}
}
private void setUp () {
DesiredCapabilities capabilities = new DesiredCapabilities();
capabilities.setCapability(“build”, “Test Build”);
capabilities.setCapability(“name”, “Test 123”);
capabilities.setCapability(“platform”, “Windows 10”);
capabilities.setCapability(“browserName”, “Chrome”);
capabilities.setCapability(“version”,”70.0″);
capabilities.setCapability(“resolution”,”1280×1024″);
capabilities.setCapability(“selenium_version”,”3.13.0″);
capabilities.setCapability(“visual”,true);
capabilities.setCapability(“chrome.driver”,2.42);
try {
System.out.println(“https://” + username + “:” + accesskey + gridURL);
driver = new RemoteWebDriver(new URL(“https://” + username + “:” + accesskey + gridURL), capabilities);
// System.out.println(driver);
} catch (MalformedURLException e) {
System.out.println(“Invalid grid URL”);
} catch (Exception e) {
System.out.println(e.getMessage());
}
}
private void tearDown () {
if (driver != null) {
((JavascriptExecutor) driver).executeScript(“lambda-status=” + status);
driver.quit();
}
}
}
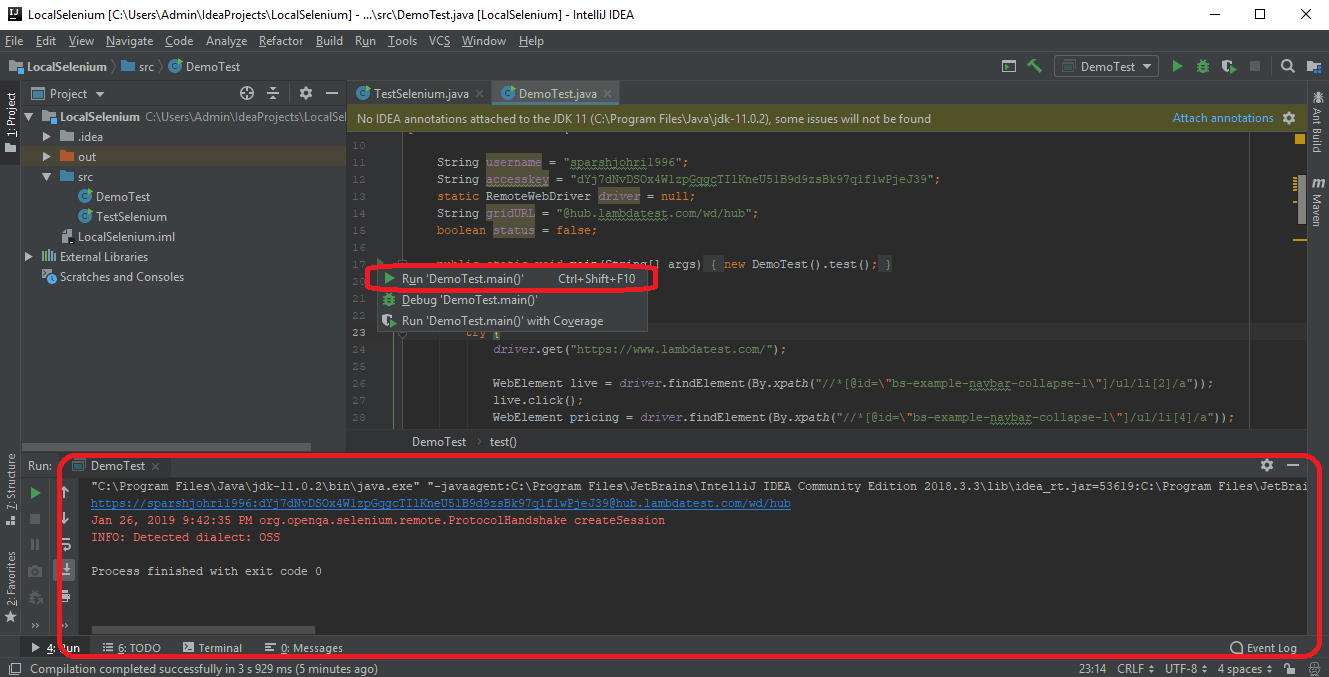
Run command and Console Logs
Click on the “Run” button in the code editor and run the following Selenium test session in action in your LambdaTest account. You can also check all the console logs in your code editor itself.
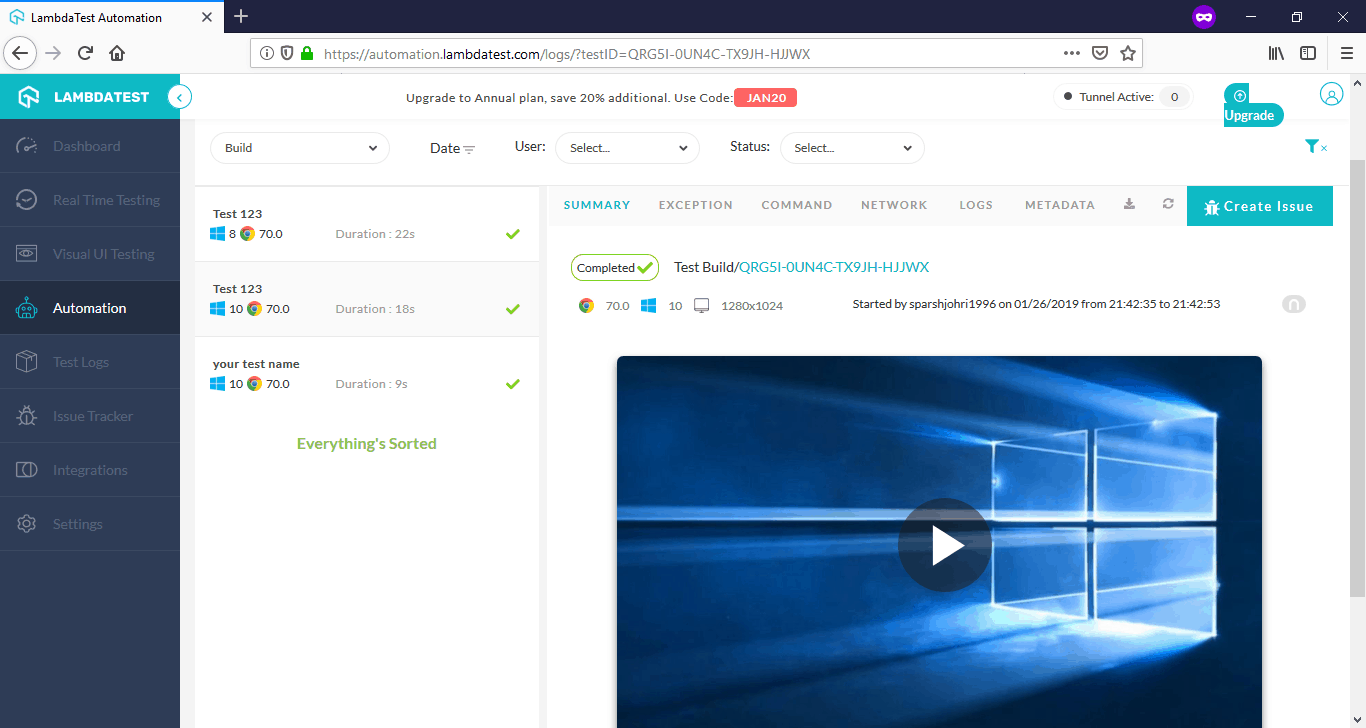
Live Video Streaming of selenium tests
Here you go! As you click on the Run button in the code editor to run the DemoTest class, your automation test will start in your LambdaTest account. The test script will run on your selected machine configuration and with LambdaTest you can also view your test’s video session on the go.
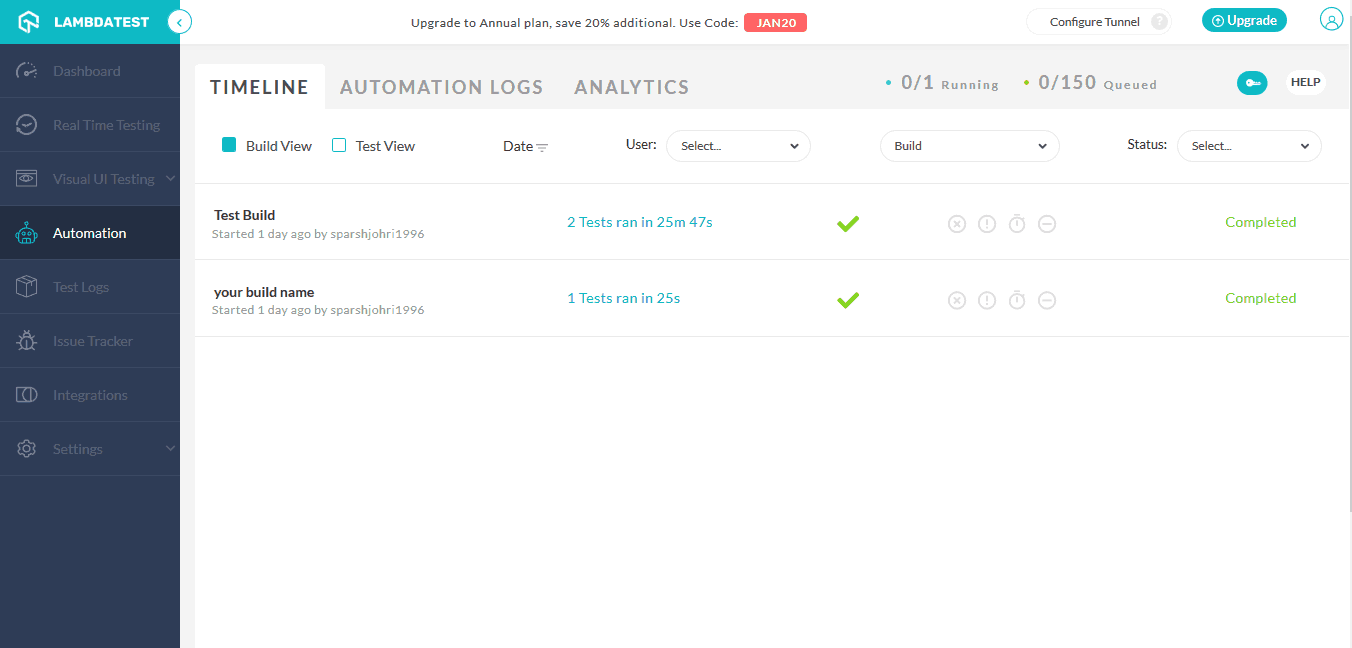
Timeline
With LambdaTest, you can track all your Selenium tests within the Timeline section. You can also filter based on the Build and Test view.
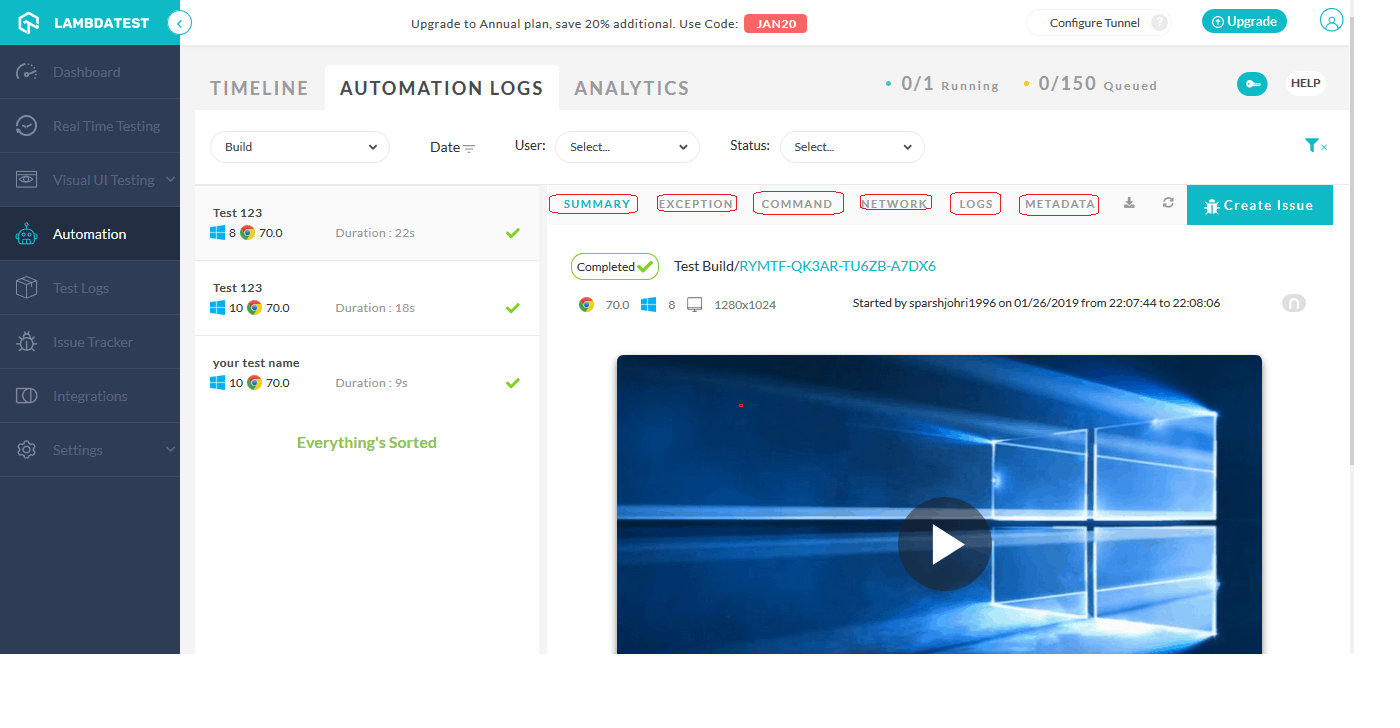
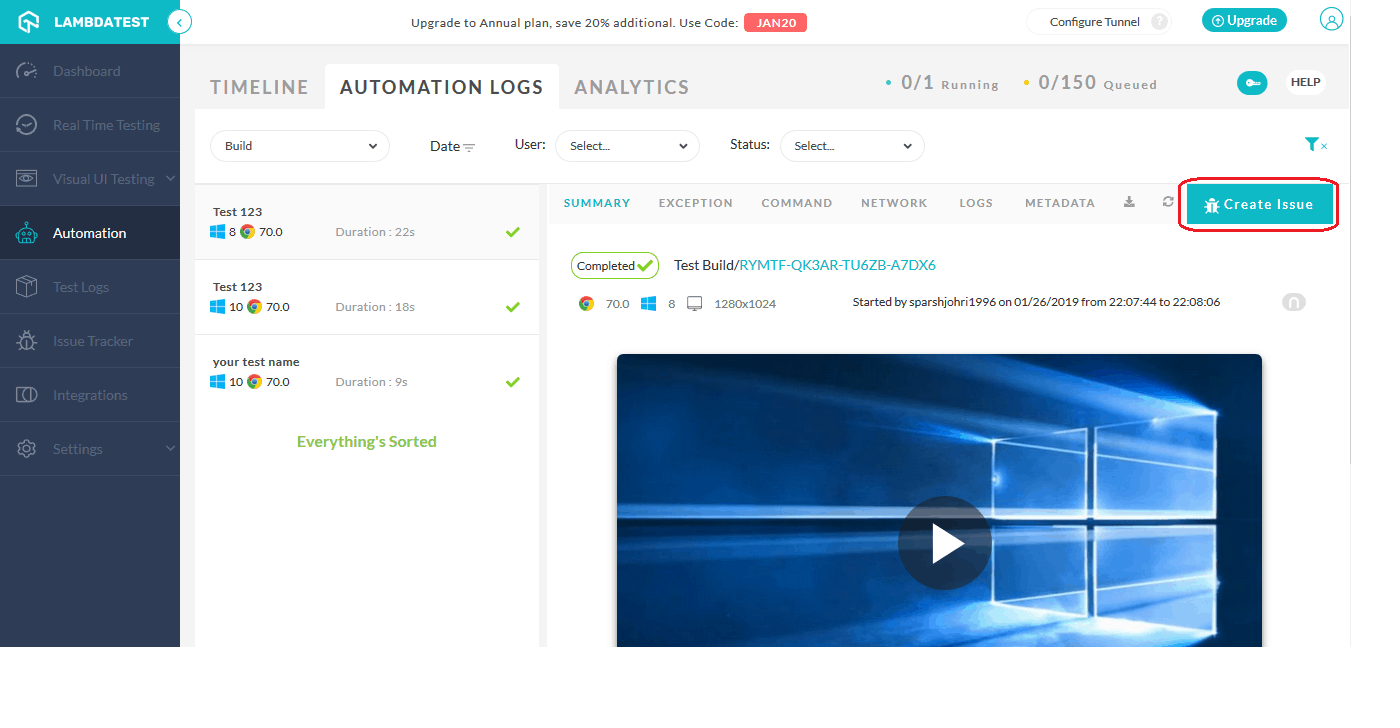
Automation Logs
The best thing that you’ll love the most about LambdaTest Automation is that it also includes Automation logs. With Automation Logs, you can find the Summary, Exception, Command, Network, logs, and Metadata. Also, you can download all the screenshots and videos for future reference.
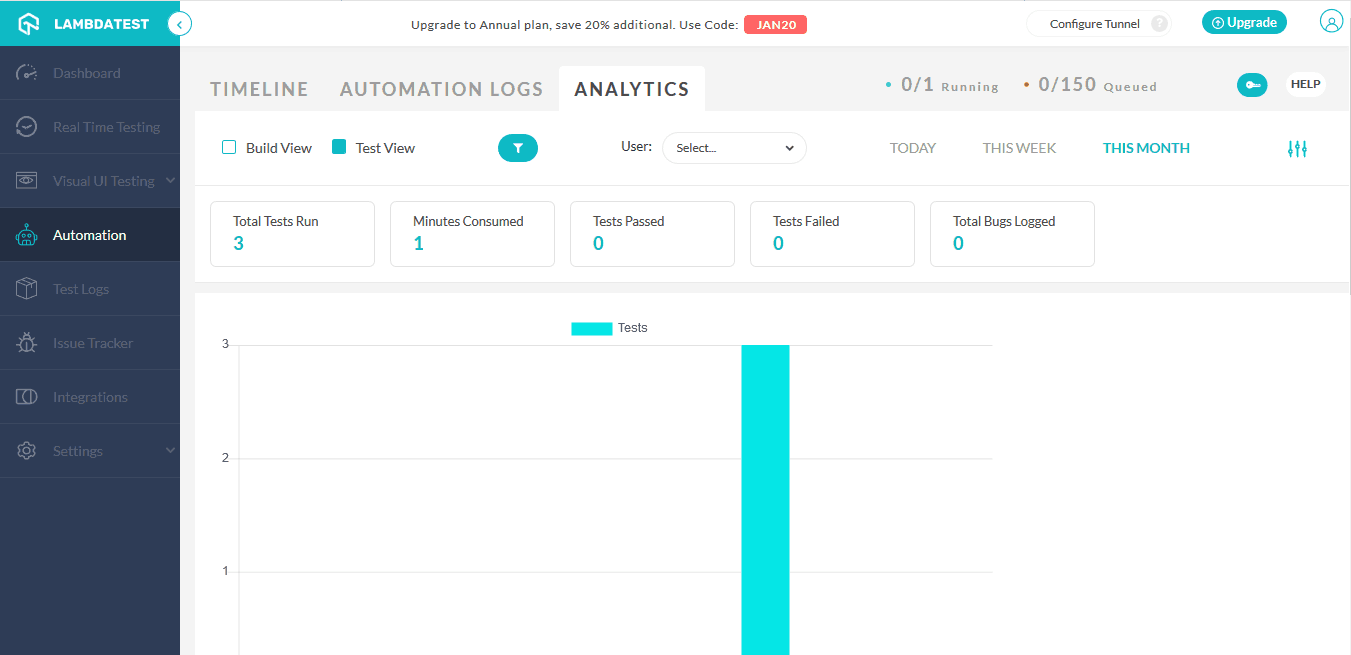
Analytics
LambdaTest automation analytics section provides you with data like how many tests you ran, Minutes consumed, Tests passed, Tests failed, etc. LambdaTest Analytics helps you track your improvements and helps to build a better product.
Mark As a Bug
One more thing that you’ll find in LambdaTest is “Mark as a Bug”. You can mark a bug in your integrated bug management tool. So, if you find any issue in your Selenium test session, you can move it directly to your favorite bug management or project management tool by clicking on the Create Issue button.
Results
The above code will open the selected browser and perform the following steps as instructed. You can perform the same action on more than one browser or even multiple browsers simultaneously by using LambdaTest.
Conclusion
Cross-browser testing is no doubt an integral part of any online business. However, this becomes challenging and sometimes tiresome and monotonous. With an online cross-browser testing cloud grid, you can very easily automate your cross-browser testing across thousands of browsers and make sure that your website doesn’t break on any device or browser. So, go ahead, write beautiful code, and get your website tested, now!
I hope this tutorial helped you to set up the How to Use Selenium for Website Automation Testing? feature. If you like this article, please share it with your friends. If you want more blogging tips, follow BlogVwant on Facebook, Twitter, and YouTube.
How to use Selenium Automation Testing? – FAQs
What is an example of web automation?
Typing credentials into an authentication form, dragging and dropping elements on a web page, and uploading a file to a web application.
What is the use of TestNG in Selenium?
TestNG makes automated tests more structured, readable, maintainable, and user-friendly. It provides powerful features and reporting. Its high-end annotations like data provider, make it easier to scale up, as you perform cross-browser testing across multiple devices, browsers, and their versions.
Can we use Selenium for backend testing?
Selenium is a popular tool primarily used for automating web browsers for frontend testing, but it can also be used for backend testing. In backend testing with Selenium, you can interact with APIs, test server responses, and perform other backend-related tasks.
What is Web Automation Testing?
Automation testing helps to relieve the bulk of tedious and repetitive human tasks. These days the majority of the software made available on the internet is introduced in the form of web apps.
How much Java is required for Selenium?
Most of the Selenium testers use Java Programming for writing Selenium Test Script, So try to learn Java for Selenium. Java Standard Edition or Core Java is enough for Automated Testing with Selenium, and Advanced Java is not required.