
Do you want to create an order form on your WordPress website to collect payment? Then you can follow this article to learn how to build a simple order form with and without online payments using WPForms.
What is an order form? Why should I have to create it?
An order form is an online document provided for customers to collect the required orders from them.
You must create the order forms to full fill the following needs.
- To collect orders from customers.
- To know the price details.
- To clarify the goods/services needed.
- To identify customer contact details.
- To make orders convenient for customers.
You can create an order form or any type of form using WPForms WordPress plugin.
- You Might Like: What is Payment Gateway? How Payment Gateway Works.
- 6 Best Payment Gateways For International Transactions.
What is WPForms?
WPForms is the simplest, fastest, most powerful, and drag & drop form builder. This permits you to create a simple order form for your WordPress site in just a few minutes!
It helps to create many types of complex forms more easily. Some of them are
- Order Form
- Contact Forms
- Survey Forms
- Free Quote Forms
- Payment Form
- Suggestion Forms
- Membership Forms
- Newsletter Signup Forms
- Registration Forms
- etc.,
How do I create an order form for my website
To make payment options convenient to your users. You must provide online payment and offline payment options to them.
Therefore, you have to create the following two order forms for your WordPress site. And you must make those forms available for your customers on your site.
- Order form with online payments.
- Order form without online payments.
Now concentrate and carefully follow the steps to learn how to create the above two forms using WPForms.
1. How to create a simple order form with online payments?
Using WPForms, you can easily build a simple order form with online payments in just 5 steps.
You just follow the below steps to build a simple order form with online payments.
- Build a Simple Order Form in Your WordPress Site.
- Configure Your Order Form Notifications.
- Configure Your Order Form Confirmations.
- Configure the Payment Settings.
- Add the Created Order Form to Your Website.
1.1 Build a Simple Order Form in Your WordPress Site.
The very beginning step is you must purchase and install WPForms on your WordPress site. That is you must buy WPForms plans Elite or Pro to use Paypal or payment features.
Later you must install WPForms plugin to your WordPress site.
Once the purchase and installation are completed. Then you can start building a simple order form from your WordPress site itself.
Just go through the following to create a simple order form that accepts online payments through Credit Card and PayPal.
- Go to your WordPress site admin dashboard.
- Navigate to WPForms >>Add New.
- Enter the name of the form like Billing/Order Form.
- Just below the screen, select the inbuilt template Billing /Order Form.

- Now you can see the heading like Available Items.
- Just scroll down to it in the preview screen on the right side. And click on it.
- You can view the various field options for Billing/Order Form on the left panel.
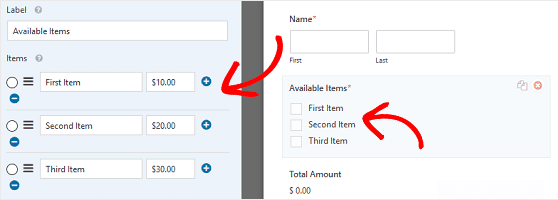
- Now you can rename, add, delete and manage certain fields. That is, you can customize your Billing /Order Form as you require.
- Just drag the required fields from the left-hand side and drop them on the right-hand side. This is how you can add more fields.
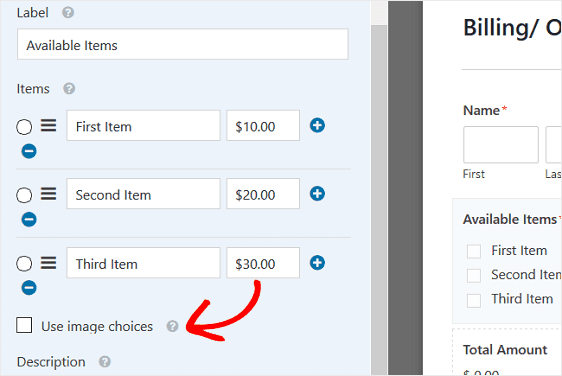
- Click the checkbox of Use image choices to upload images.
- This gives the visual look to your users about what they are ordering.
Lastly, click Save.
Then all your modifications of Billing/Order Form can be saved.
1.2 Configure Your Order Form Notifications.
Form Notifications are an excellent means to email order forms to customers when they submit them on your site.
You can also receive emails whenever customers submit order forms. Until you disable this feature, you can receive those notifications.
Just follow the below points to build a form notification.
- Go to your WordPress site Dashboard.
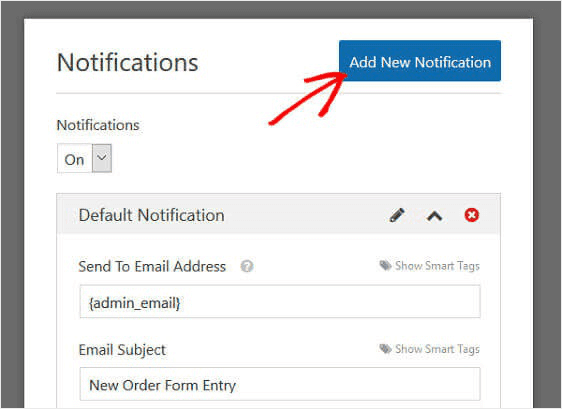
- Navigate to WPForms >> Settings >> Notifications.
- Click on the Add New Notification button.
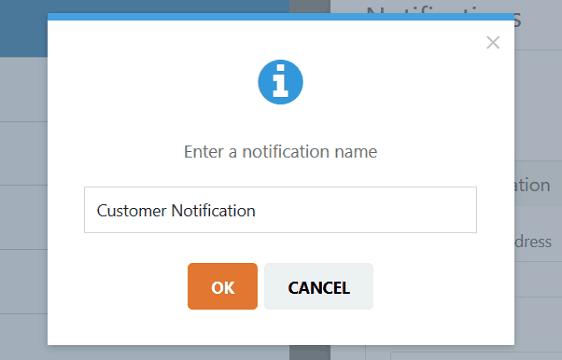
- Now a popup appears asking Enter a notification name.
- Just name it like Customer Notification.
- Click OK.
Click the link Show Smart Tags on the right side of Send to Email Address.
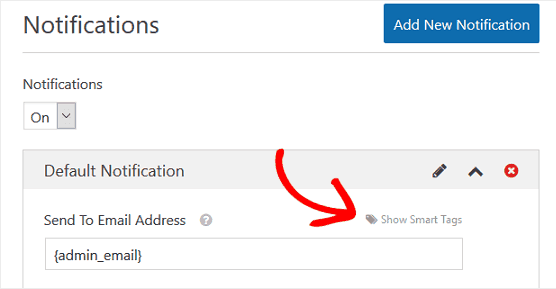
Choose Email so as to send the order form to a customer-provided email address.
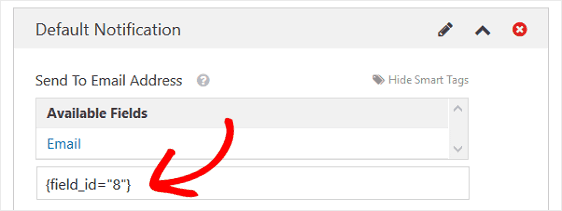
Here the number “8” represents the filed number on the order form.
You can also configure the following fields in the order form.
- Email Subject.
- From Name.
- From Email.
- Reply-to.
- Message.
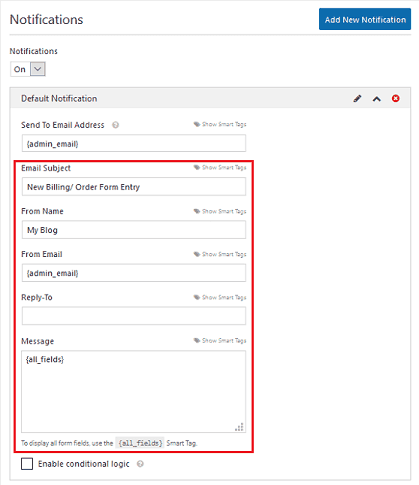
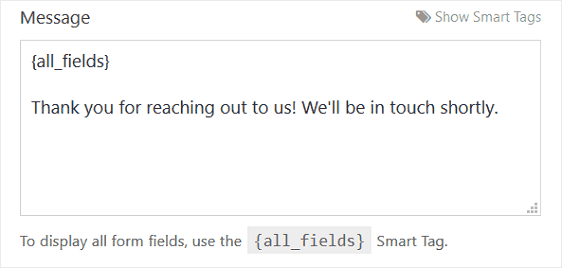
In the Message field form, you can use the default existing smart tag {all_fields}. This allows customers to see all the data as they filled in the order form.
You can also type some special text in the Message field form to convey your message.
Oh! Click Save to store all the changes you have made.
- Recommended: Top 6 PayPal Alternatives That Save Your Transaction Fees.
- 6 Best List Of Top Payment Gateways In India.
1.3 Configure Your Order Form Confirmations.
Once the customers submit an order form, messages are displayed to them. Those messages are called Form Confirmations.
You can choose any one of the following three confirmation types.
- Message.
- This is the default confirmation type.
- Whenever customers submit a form, a Message confirmation is sent to them.
- This confirmation message makes the customers so happy. And they can realize that their order form is processed successfully.
- Show Page.
- This confirmation type takes the customers to a special webpage on your site thanking them for making an order.
- Go to URL (Redirect).
- This conformation type takes the customers to a different website.
Now let’s see how to set up the confirmation types.
- Navigate to WPForms >> Settings.
- Click on the option Confirmation.
- Select any one confirmation type.
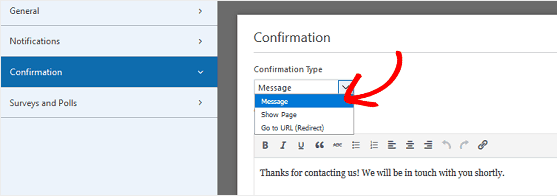
Now you can type the confirmation message that you want to convey to your customers.
Then, click Save.
1.4 Configure the Payment Settings.
WPForms easily integrates your order form with both the PayPal and Stripe payment gateways. These can accept all the online payments.
First, you have to install and activate the Payment Addon of WPForms on your WordPress site. Then you can configure the payment settings on your Billing/Order forms.
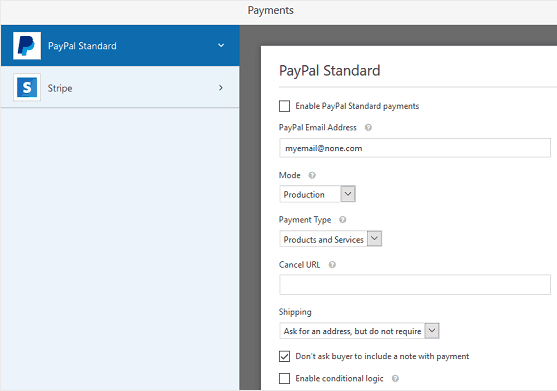
Just follow the below points to configure the payment settings.
- Go to your WordPress site admin dashboard.
- Navigate to WPForms >>Payments.
- Click the PayPal Standard option.
- Enter your PayPal email address.
- Choose Production mode.
- Select Products and Services.
- And adjust the remaining settings as you need.
- Click Save.
1.5 Add the Created Order Form to Your Website.
Now you have created the Billing/Order Form. And configured with Notifications, Confirmations, and Payments.
Then the final step is to add the created order form in various places on your site like webpages, posts, and sidebar.
Just follow the below points to add the created order form in a post on your site.
- Move to your WordPress site Dashboard.
- Create a new post or page.
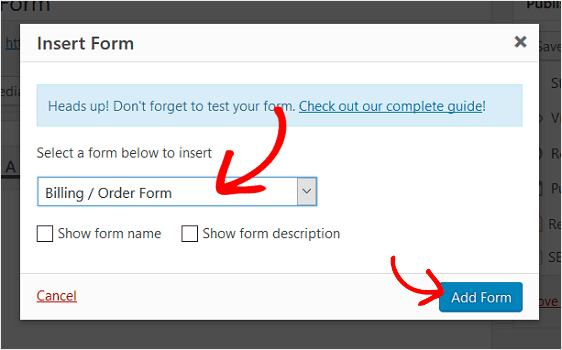
- Click on the Add Form button over the content of your new post.
- Then a pop-up window displays.
- Here select the created form. That is the Billing/Order Form.
- Click on the Add Form button.
- Now publish your new post. Then the Billing/Order Form appears on your site along with the post.
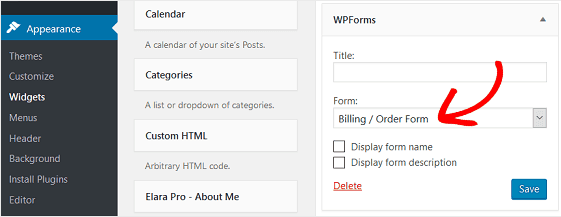
You can also add the created form to your site in the sidebar widget area.
- Navigate to Appearance >>Widgets.
- Add a WPForms widget to your sidebar.
- From the drop-down menu, choose the Billing/Order Form.
- Click Save.
That’s all! You have successfully created and configured the Billing/Order Form with the online payments.
2. How to create an order form without online payments?
There are a few reasons why many companies worldwide want to avoid collecting online payments along with the order forms.
- Customers may prefer to pay through checks, money orders, and net banking.
- Companies may prefer to send invoices to customers requesting payments.
- To make payments convenient to customers.
- Companies don’t like the idea of accepting payments through bank cards like credit and debit cards.
You just follow the below steps to build a simple order form without online payments.
- Build a Simple Order Form in Your WordPress Website.
- Configure Your Order Form Notifications.
- Configure Your Order Form Confirmations.
- Add the Created Order Form to Your Site.
The above steps are similar to the previous section. But only one step is skipped. That is Configuring the Payment Settings.
That’s all! Now you successfully created the two Order Forms to accept the orders with and without online payments.
Conclusion
Oh great! This article once again proved that WPForms is the easiest plugin for WordPress. You can not only build the Order Forms but also other required forms. That too easily, quickly and without writing a single line of code!
Many experts worldwide suggest WPForms is an ideal plugin for WordPress. Being a WordPress user, you can give the topmost priority to WPForms.
I can strongly believe that this article about How to create an order form really aided you to create two order forms to accept payments online and offline. If so, then share this article and follow BlogVwant on Facebook, Twitter, and YouTube for more tips.