
Do you host a website at the A2Hosting service? Do you want to know how to Enable Cloudflare on A2Hosting cPanel? And you want to optimize, run your website with no lag, and protect your website from SQL injection attacks with less cost. Then, Cloudflare is the best choice for you.
Then go through this article to learn how to enable Cloudflare in A2Hosting service to accelerate, optimize, and protect your website.
- READ MORE: Rocket.net Review: The Most Secured Managed WordPress Hosting
- 7 Best Managed WordPress Hosting Services
What is Cloudflare service?
Cloudflare is a free Content Delivery Network (CDN) that helps in improving site performance, speed, and loading time. As well, it protects our website from SQL injection attacks and identity thefts.
For network security, Cloudflare provides services like DDoS Protection, WAF, bot Management, SSL/TLS, Cloudflare spectrum, and Network interconnect.
For Performance and Reliability of our website, CDN, DNS, Argo smart routing, Load balancing, stream Delivery are provided by Cloudflare.
Why should I enable Cloudflare to website:
Cloudflare is available for both free and paid versions. To optimize, speed-up, and protect your website from SQL attacks, enabling the Cloudflare service is the best option.
As the website gets more traffic and visitors, there might be chances of threats from hacks, so to protect those kinds of problems, Cloudflare has to be enabled to your site.
When a visitor wants to access or to download the content available on the website fastly, Cloudflare connects to the nearer server instead of contacting the A2Hosting. This will reduce the time for loading the content of the site.
Not only the Paid version, but also the free version of Cloudflare provides best features that are useful for the website.
- READ MORE: How To Use Cloudflare On Dreamhost Site At No Cost or Low Cost
- Cloudflare Free Vs Pro Vs Business Vs Enterprise
How to Enable Cloudflare on A2Hosting
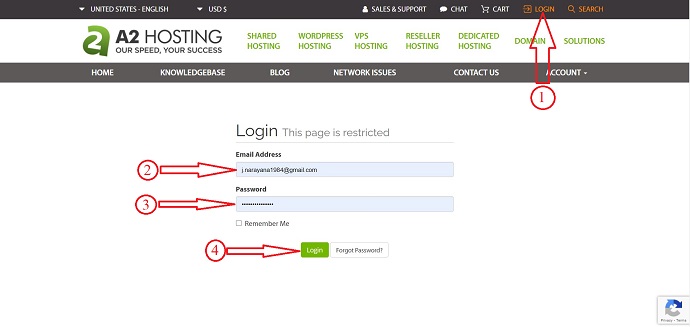
Go to A2Hosting website, and Login to A2Hosting using your login Credentials.
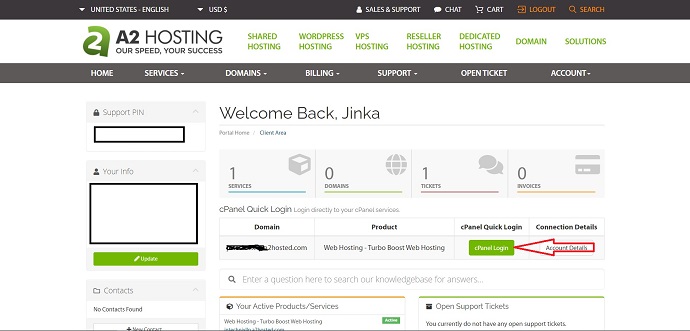
Then, you are redirected to the client Area or Dashboard of A2Hosting. Click on cPanel login and login to cPanel by entering username and password.
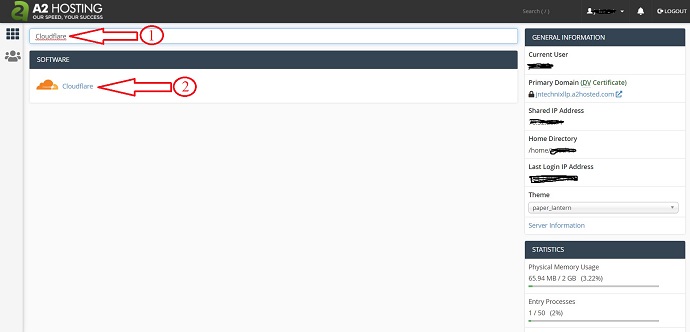
Scroll down to the software section and select Cloudflare. or Else, type Cloudflare and select from the result as showing in the below screenshot. You are moved to the Cloudflare homepage.
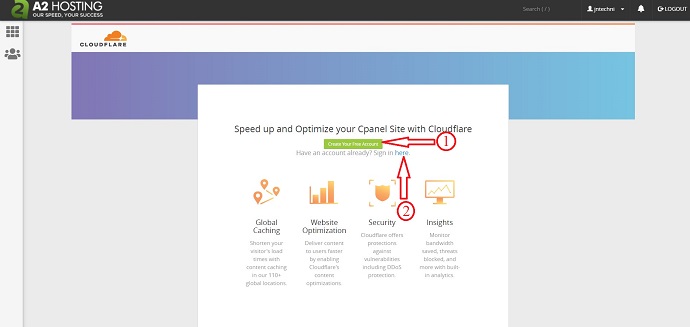
Here, If you are a new user, click on create a new account in Cloudflare. If you already have an account, then click on sign-in and login to your account.
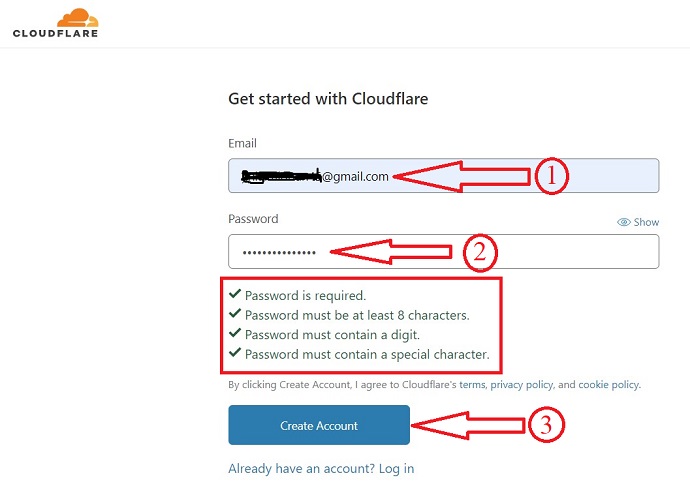
I selected to create a new account, then a new window will open. From there new account can be created by providing your mail id and entering a new password. While selecting the password, make sure the password should contain the characters as showing in the below screenshot.
That’s it, the account is created and logged-in to Cloudflare and now you have to enter your site domain for which you want to enable Cloudflare service. Enter the website domain and click on “Add Site”.

After adding the site, Cloudflare is enabled automatically to your site, and you are redirected to the homepage of Cloudflare. You can also add more domains by following the same procedure. All the domains that you added are shown on the domain overview page as showing in the below screenshot.

That’s it, Cloudflare services are enabled to your site and your website will be optimized so that the time to load your site reduces and also protects your site from SQL attacks.
I definitely feel that you got to benefit from this article on How to enable Cloudflare on A2Hosting cPanel. If so, do a favor by sharing this article and follow BlogVwant on Facebook, Twitter, and YouTube for more tips.