
If you set up WordPress SMTP properly, you will solve your Email delivery issues. Do you not at all receive email notifications from your WordPress contact forms? And are you seeking to resolve this issue with ease and fast? Then you have to set up Simple Mail Transfer Protocol (SMTP) on your WordPress site.
Just go through this article to learn about the steps involved to set up SMTP on your WordPress site using Amazon SES and the WP Mail SMTP plugin.
Why are you not receiving email notifications from the contact form plugins?
- By default, WordPress uses the PHP Mail function to send emails generated by any contact form plugin like WPForms.
- But, in practice, most WordPress hosting servers won’t be configured to use the PHP Mail function.
- So, you can’t receive emails on your WordPress site.
Further, if proper authentication is not there, then emails can either go into the Spam folder or don’t deliver at all.
That’s why many experts recommend using SMTP to send emails from your WordPress site. And you should avoid using the default PHP mail function.
What is SMTP?
Simple Mail Transfer Protocol (SMTP) is an industry-standard way used to send email messages. And it uses the proper authentication method to ensure email deliverability.
What is WP Mail SMTP?
WP Mail SMTP is the simplest way to fix WordPress email delivery and ensure your emails reach the inbox. Further, WP Mail SMTP is the most powerful and user-friendly SMTP plugin.
Usually, it resolves email delivery problems by reconfiguring your WordPress site to use proper SMTP mail providers like Amazon SES, Brevo(Formerly SendInblue), and more when sending emails.
First time customers will get the $50 discount on all WP Mail SMTP plans through This WP Mail SMTP discounted pricing page.
What does Amazon SES stand for?
Amazon Simple Email Service (Amazon SES) is a reliable and cost-effective email service developed by Amazon.com for all businesses that use email to keep in contact with their customers.
What are the benefits of Amazon SES?
- Compared to many hosting servers, it guarantees high email deliverability and is more reliable.
- It permits you to send as many emails as you require. And it doesn’t put any limit.
- If WordPress sends too many emails in a short period of time. Then, no problem at all. You can get notifications. But it won’t stop notifications to you.
- It offers some tools for email marketing.
- You Might Like: Why My WordPress Not Sending Email? Quick Solution
- 6 Best WordPress Landing Page Builders or Plugins
How to Set Up WordPress SMTP Using Amazon SES
The following are the steps involved to set up WordPress SMTP using Amazon SES.
- Create a Free AWS Account
- Choose Your Region
- Create an IAM User
- Configure IAM User Setting Permissions
- Review Your User Details
- Switch to AWS Production Mode
- Install the WP Mail SMTP Plugin
- Set Up WP Mail SMTP and Amazon SES
- Send a Test Email
STEP-1: Create a Free AWS Account
Do you already have an AWS account? Then you can skip this first step.
If you are new to AWS and you don’t have an AWS account. Then you have to sign up for a free account with AWS.
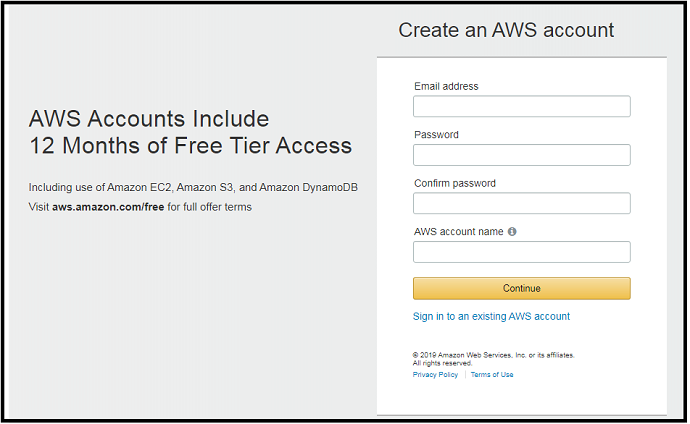
STEP-2: Choose Your Region
Next, you have to select your region. And you have to fill in the other details like your Full Name, Company Name, Phone Number, Address, City, and Postal Code.
STEP-3: Create an IAM User
This step includes:
- Create an IAM Users page and Sign in.
- Set up a new user.
- Select the AWS access type.
Create an IAM Users page and Sign in:
Click and follow this link to create the AWM IAM Users page.
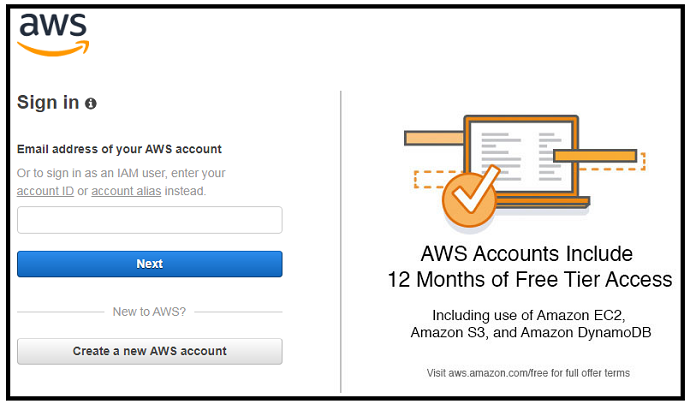
After signing in, click on the blue button ‘Add User‘.
Set up a new user:
Next, you have to set up a new user. That is you have to fill the ‘User name‘ field with any name. But the following name format is recommended.
yourdomain_wpmailsmtp
Here, you can set up and add additional users too.
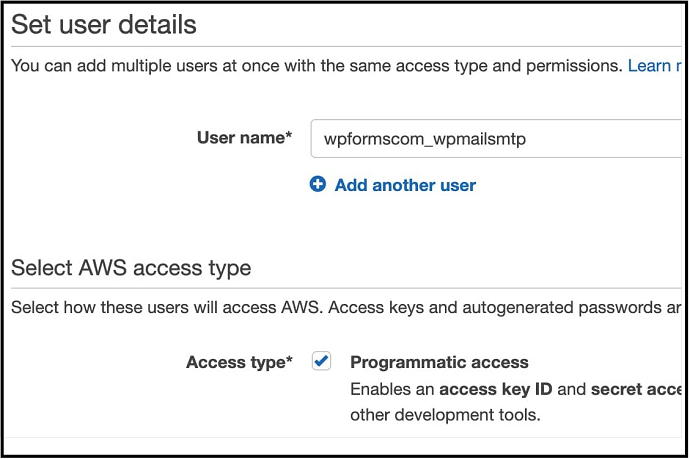
Select the AWS access type:
Now, click the ‘Programmatic access‘ checkbox next to the ‘Access type‘. Next, click on the button ‘Next: Permissions’.
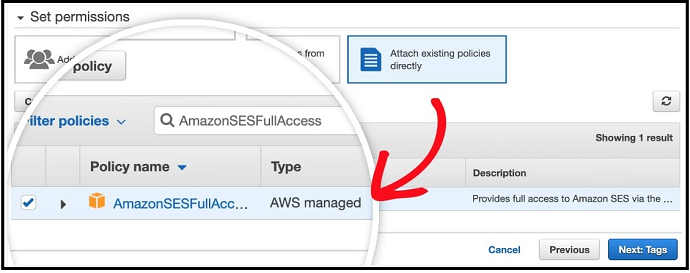
STEP-4: Configure IAM User Setting Permissions
- Now, from the top row of the boxes, select ‘Attach existing policies‘.
- Next, type AmazonSESFullAccess on the search bar and press enter.
- Then only one result is displayed. That is, AmazonSESFullAccess.
- Now, click on the checkbox next to it. And ensure that the tick mark is there in that checkbox. So that this permission is added for the user.
- Then, Click on the Next: Tags button.
- Now, skip the next page and click on the Next: Review button.
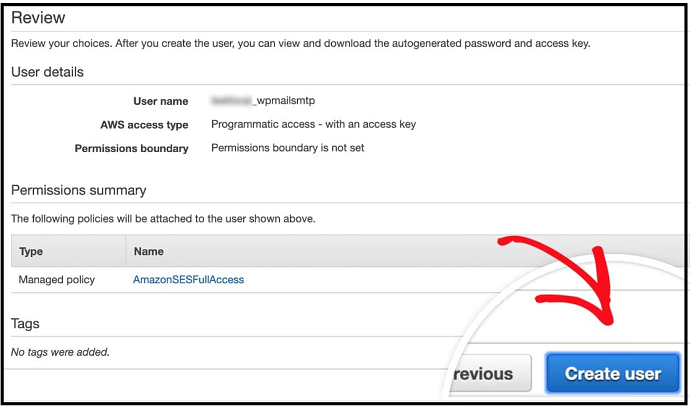
STEP-5: Review Your User Details
- Now, on this page, you can see all the details you have chosen up to now for the user.
- Check all the details twice or thrice.
- Once you found all the details are correct, just click on the button ‘Create user’.
- Next, you can see:
- a success message.
- Access Key ID, and
- Secret Access Key for your user.
- Now download them as a CSV file or copy them into a safe location. Because you can’t see these Access Key details, once you close this page.
- Or you can keep this page open for now. So that you can use these keys later.
STEP-6: Switch to AWS Production Mode
By default, all Amazon SES accounts begin in Sandbox Mode. So, you have to switch from Sandbox Mode to Production Mode so that you can send emails to anyone. Just follow the below steps to switch to Production Mode.
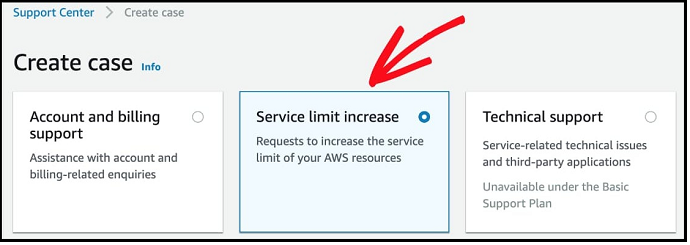
First, you have to click this link and create a request with AWS.
Next, select the ‘Service limit increase‘ box, in the top row of boxes.
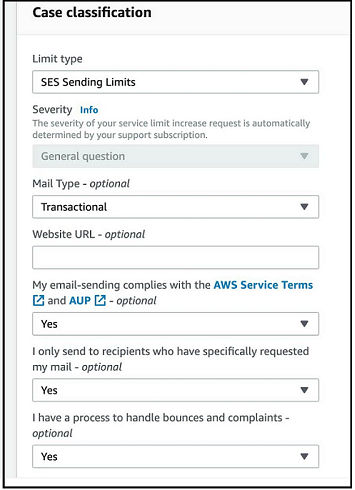
Next, you have to fill out the Case Classification form. Within this form, you have to prove to Amazon SES that your site will send emails for legitimate purposes only.
Now let’s follow the below points carefully, to fill this form.
- Limit Type: SES Sending Limits
- Mail Type: Transactional
- Website URL: Your site’s home URL
- My email-sending complies with the AWS Service Terms and AUP: Yes
- I only send to recipients who have specifically requested my mail: Yes
- I have a process to handle bounces and complaints: Yes
- Region: Choose the same region as when you set up your AWS account (whichever is closest to where your site’s server is located).
- Limit: Desired Daily Sending Quota
- New limit value: Estimate the maximum number of emails you expect your site to send per day.
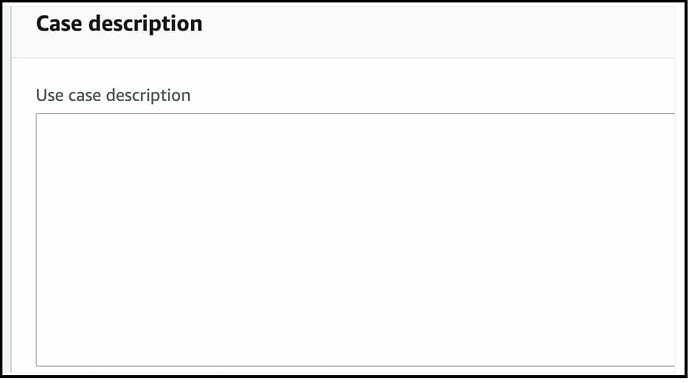
Next, you need to fill out the Use Case Description. Here, you have to describe:
- what kind of site you have.
- why do you need to send out emails?
- type of emails that your site will send. Just like confirmations of form submissions, purchase receipts, and more.
Here, keep in mind that you should describe all the above in detail. Because Amazon can reject your request if it doesn’t feel enough information is provided.
After entering all details, then click on the Submit button.
Next, you will receive two emails from AWS. Both emails confirm that a new case is created.
In general, AWS will take one business day to review your request. In the mean time, you can continue the next steps.
RECOMMENDED – 7 Best WordPress Portfolio Plugins To Try in 2019
STEP-7: Install the WP Mail SMTP Plugin
- Log into your WP Mail SMTP Account.
- Next, click on the Downloads tab. Then on the button Download WP Mail SMTP.
- Now, a zip of the WP Mail SMTP plugin is downloaded. Suppose, if the downloaded folder appears as a regular folder. Then that folder must be zipped.
- Next, move to the admin dashboard on your WordPress site.
- Next, go to Plugins > Add New. And then click on the button Upload Plugin.
- Next, click on the button Choose File. Then select the downloaded zip file and upload it.
- Next, click on the button Install Now. Then the WP Mail SMTP plugin installs on your WordPress website.
- After installing the plugin, Next, click the button Activate Plugin.
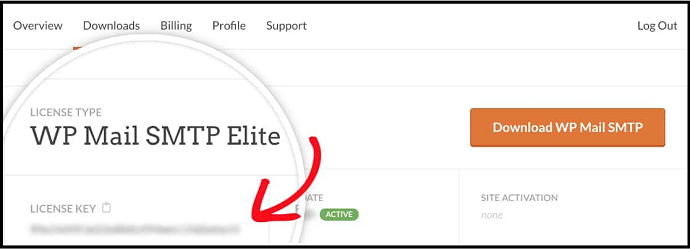
- Now, move back to your WP Mail SMTP account page. And click on the Downloads tab.
- Then you can see the LICENSE KEY. Just copy it.
- Next, go back to your WordPress site admin area. And click on WP Mail SMTP.
- Next, click on Settings. And then on the tab General.
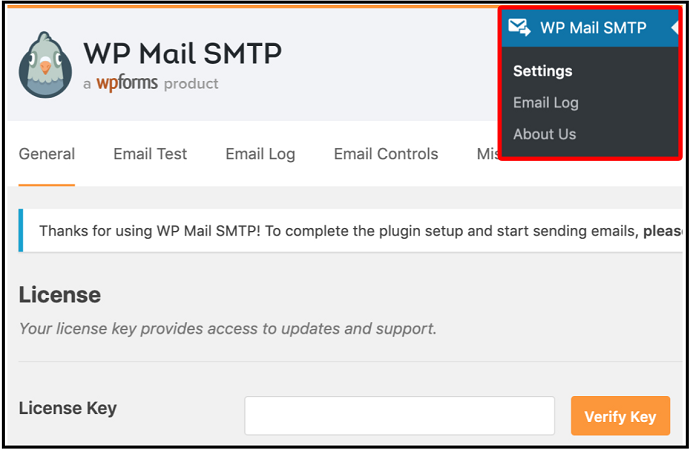
- Now you can see the License Key field.
- Next, paste the copied license key in that field.
- Next, click on the Verify button.
- Next, a popup message is displayed. Just click OK.
- Now just below your license key field, you can see your license level.

That’s it! You have now installed WP Mail SMTP on your WordPress site.
STEP-8: Set Up WP Mail SMTP and Amazon SES
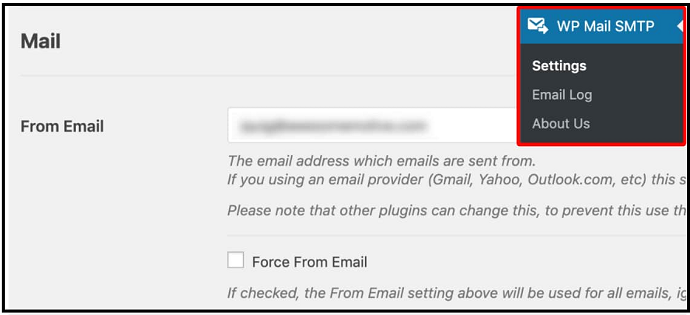
- Now, go to WP Mail SMTP > Settings.
- Next, you can see From Email field option.
- Here enter any valid email address. But most experts recommend using a domain-specific email address. That is, example@yourwebsite.com.
- If you want From Email to be the same for all emails. Then, click the checkbox of Force From Email.
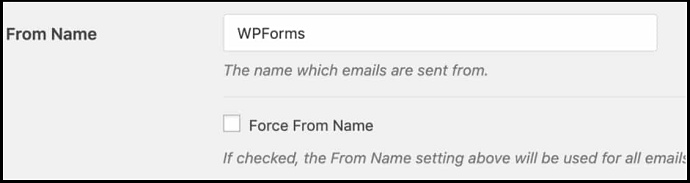
- Now, just below the From Email, set the From Name.
- This is the name associated with the sent-out emails.
- By default, you have to set your site’s name here.
- Similar to the previous, you can also select the checkbox of Force From Name.
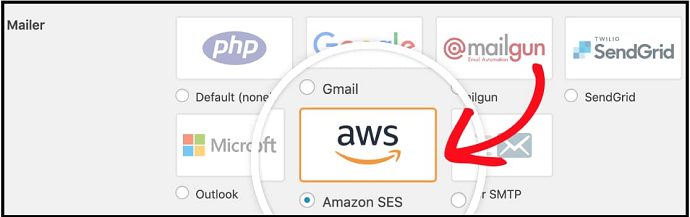
Now, scroll to the Mailer field. And select the option ‘Amazon SES‘.
- Next, click on the checkbox next to the Return Path.
- If you enable this option, then you can know about non-delivery receipts and bounce messages, if any.

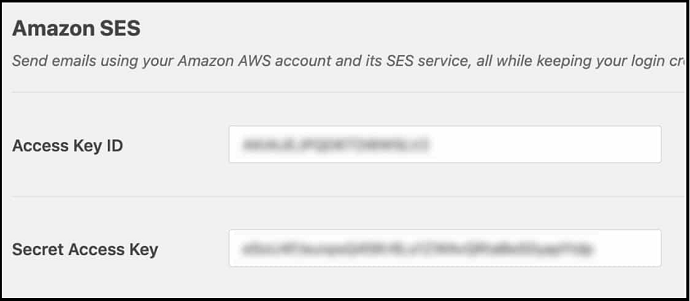
Next, you can see a new section on Amazon SES. Here you have to enter the Access Keys details as you obtained in “STEP-5”.
- Next, select the same ‘Region’ that you have selected previously in “STEP-2”.
- Next, click Save Settings.
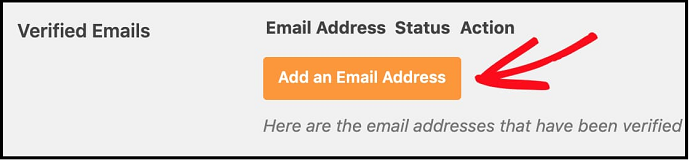
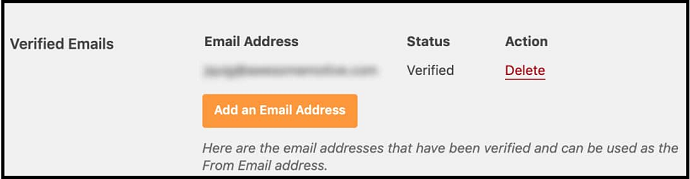
- Now, an additional setting will appear like Verified Emails.
- Here, you can add any emails that you want to use like a From Email on your site.
- So, if you want to add a new verified From Email, click on Add an Email Address button.
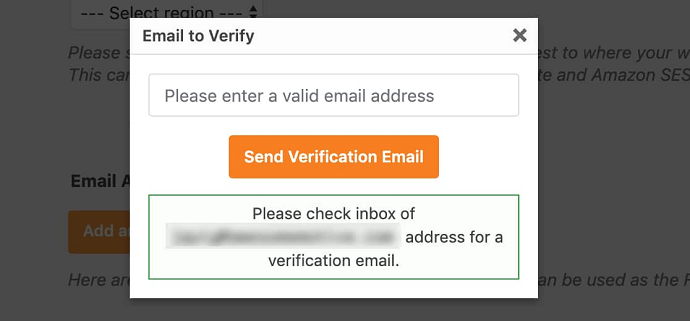
- Next, an overlay appears, where you can add one email address at a time.
- Next, click on the button ‘Send Verification Email‘.
- Then you can see a message asking you to check your inbox for a verification email.
- Now, you can receive an email from Amazon Web Services with a verification link.
- Next, click this link within 24 hours. Once you click, then your new email address is verified.
- After verifying the new email, go back to your site’s WP Mail SMTP settings and refresh the page.
- Then, all verified emails are displayed here.
STEP-9: Send a Test Email
- At last, you can send a test email to make sure that everything is working properly.
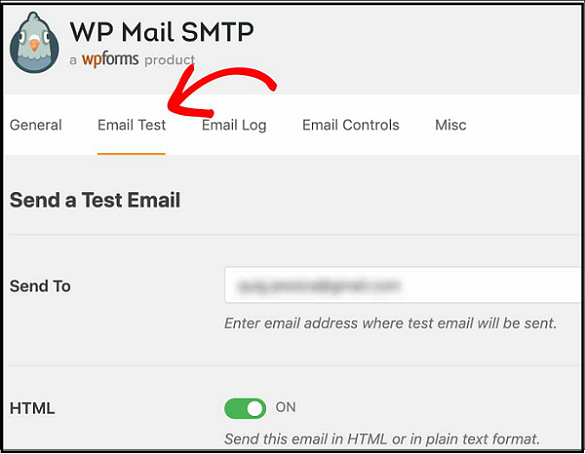
- For this, move to Settings > WP Mail SMTP. And open the tab ‘Email Test‘.
- Next, fill in the ‘Send To‘ field with your site’s admin email.
- Next, you can see, HTML which is toggled ON by default. You can also toggle it OFF, to send a plain text message. But it is recommended to keep the default.
- Next, click on the Send Email button.
After sending the email, you can see a success message.
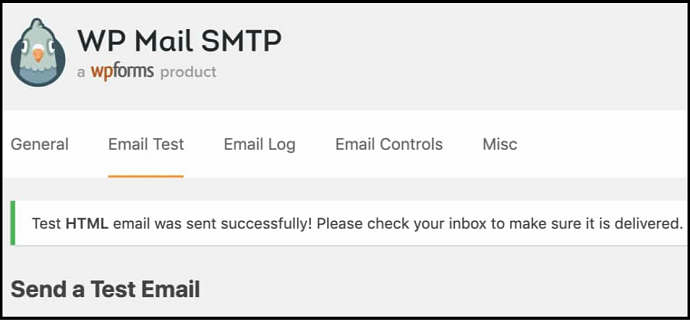
- Now go to the inbox of that email.
- Then, you can see the test email from WP Mail SMTP.
That’s it! You have set up WordPress SMTP using Amazon SES on your WordPress site.
Conclusion
Now you have learned how to set up SMTP on your WordPress site using Amazon SES and the WP Mail SMTP plugin.
Though there are a lot of different ways are there to set up WordPress SMTP on your site. Here, Amazon SES is used. Because:
- It is more reliable.
- It guarantees high email deliverability.
- It permits you to send as many emails as you require.
- If WordPress sends too many emails in a short period of time. Then, no problem at all. You can get notifications. But it won’t stop notifications to you.
- It offers some tools for email marketing.
I really believe that this article “How to set up WordPress SMTP” aided you to know the process to set up SMTP on your WordPress site using Amazon SES and the WP Mail SMTP plugin. If so, do a favor by sharing this article and follow BlogVwant on Facebook, Twitter, and YouTube for more tips.
How to Set Up WordPress SMTP using Amazon SES – FAQs
-
Do I need an SSL certificate installed on my WordPress site, to use Amazon SES?
Yes.
-
Is there a limit on the size of emails Amazon SES can deliver?
Yes. It accepts email messages up to 10 MB in size.
-
Is AWS SES free?
If you are an Amazon EC2 user. Then you can get started with Amazon SES for free. And you can send 2000 free messages each day.
-
Can WordPress send emails?
Yes. But it uses the PHP Mail function to send emails.
Great tutorial on setting up WordPress SMTP using Amazon SES! The step-by-step instructions are clear and concise, making it easy to configure email delivery settings. However, it would be helpful to mention the Postman SMTP plugin as an alternative solution. Overall, excellent guide!
Hi, I write here cause I don’t know what else to do,
Recently few days ago we move our WordPress website from Siteground to AWS Ec2 Server, we setup everything and our website is running fine on AWS server.
We also install postfix for email sending but when new users signup on our website or if anyone wants to reset the password then all verification mails are going to the spam folder, we already talk to aws premium support but not getting any help from them.
Please can anyone help us, how we resolve this issue, we use PHP mailer service inbuilt in WordPress for sending mails and we already verified our domain on AWS SES.
You can use Sendinblue along with WP Mail SMTP to send emails. Here is the Guide.