
Do you want to allow your site visitors to directly upload file attachments to your WordPress Forms? Then you have to create a File Upload Form in WordPress. Creating a File Upload Form is a great way to quickly collect information from your website visitors.
Why Use a File Upload Field on WordPress Forms?
File Upload Field is a great way for you to quickly and easily collect relevant information from your site visitors. So, you must add a file upload field to your WordPress Forms. The following are some of the forms which must need the file upload field.
- Job Application Forms:
- Here upload field is necessary for applicants to upload their resume files.
- Customer Support Forms:
- Here upload field is required for customers to upload documents to provide any additional information.
- Client services forms:
- Here upload field is necessary for your clients to attach spreadsheets and project specification documents.
- And more.
This article is the right one for you to learn how to easily create a File Upload Form in WordPress using a best WordPress form plugin WPForms. And you can also learn how to view the form submissions in your WordPress using WPForms.
What kinds of file types does WPForms allow?
Security is a huge priority at WPForms. So it restricts file types to safe files only (the same file types permitted by WordPress core). They are:
- Images such as .png, .gif, .jpg
- Documents like .doc, .xls, .ppt, .pdf
- Audio like .wav, .mp3, .mp4
- Video like .mpg, .mov, .WMV.
Why choose the WPForms plugin to create a file upload field for your contact forms?
WPForms is a forever best WordPress Contact form plugin. At present, more than three million professionals around the world use WPForms to build smarter forms and surveys. With this:
- You can easily create a file upload form in your WordPress.
- Alternatively, you can also easily add a file upload field to your WordPress contact forms.
- You can view the form submissions as entries in your WordPress.
So, you must use the WPForms plugin to easily create a file upload field for your WordPress contact forms.
WPForms Discount
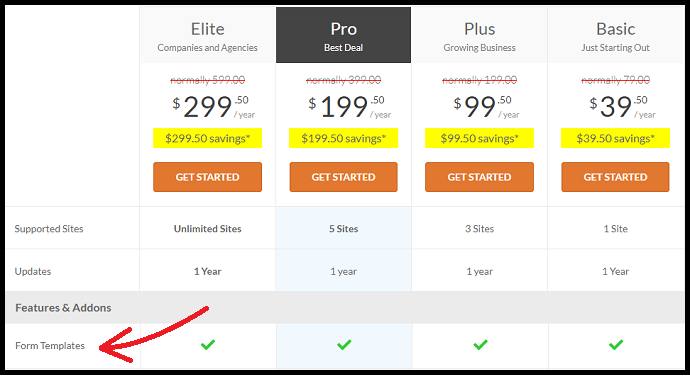
First time customers will get the 50% discount on all WPForms plans through This WPForms discounted pricing page.
You Might Like: How to Easily Build Spam-Free WordPress Contact Forms – An Ultimate Way To Put An End To All Automated Spambots
How to Easily Create a File Upload Form in WordPress Using WPForms
WPForms is a powerful and easy plugin for WordPress. With WPForms, you can easily create a file upload form without any hassle.
Now let’s view the simple steps that are involved to easily create a file upload form in WordPress using WPForms.
- Install And Activate WPForms Plugin And Form Templates Pack Addon
- Create Your Own File Upload Form in WordPress Using File Upload Form Template.
- Add File Upload Feature To Any Of Your WordPress Contact Forms (An Alternate Way To Create Your Own File Upload Form).
- Choose Modern Style And Customize It.
- Configure the General Settings of Your File Upload Form.
- Configure Notifications for Your File Upload Form To Get Email Notifications.
- Set Up Your File Upload Form’s Confirmation.
- Publish Your File Upload Form on Your Website
- View The Uploaded Files In Your WordPress.
Now let’s discuss each step in detail.
Step1: Install And Activate WPForms Plugin And Form Templates Pack Addon
The primary step is you have to purchase any of WPForms premium plans like Basic, Plus, Pro, and Elite. Because Form Templates Pack Addon is included in WPForms premium plans only. And this add on is not included in WPForms free version.
- After the purchase of any of WPForms plans, then install and activate WPForms on your WordPress site.
- Next, go to your WordPress admin panel. And click on WPForms. Then on Addons. Now you can view all of WPForms addons.
- Suppose, if you don’t see any addon, then click on the Refresh Addon button.
- Next, scroll down the page to view Form Templates Pack Addon.
- Once you see Form Templates Pack Addon, click on the Install Addon button which is present just below this addon.
- Next, Form Templates Pack Addon installs and activates on your WordPress site.
- Once the installation is completed, then you can view Status: Active, just below the Form Templates Pack Addon.
That’s it! You have now installed and activated the WPForms and Form Templates Pack Addon on your WordPress site.
Step2: Create Your Own File Upload Form in WordPress Using File Upload Form Template
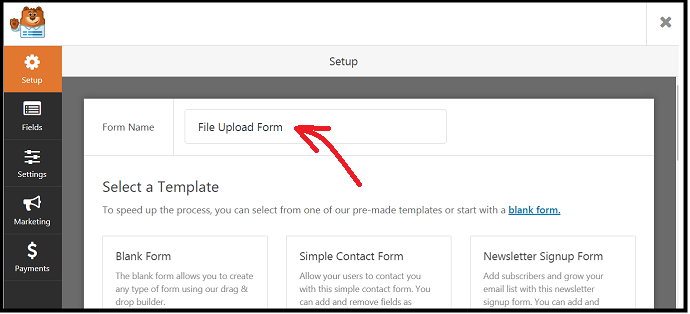
- Go to your WordPress site admin dashboard and click on WPForms in the left-hand panel. Then on Add New.
- Next, enter the name of your new form like File Upload Form.
Next, scroll down the page, to view the Additional Templates section. Then type in File Upload Form on the search bar to find the File Upload Form template.
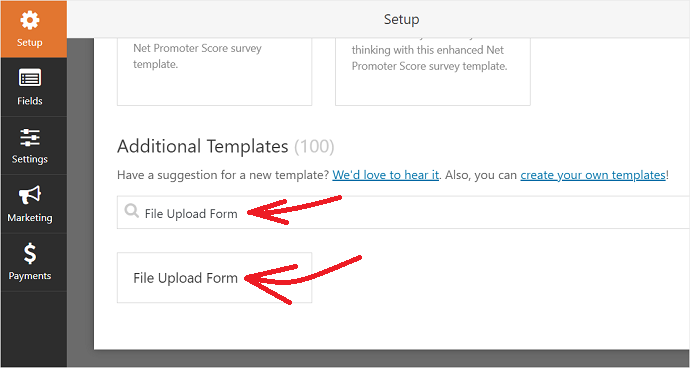
Next, click on the Form Upload Form template. Then the pre-built Form Upload Form opens.
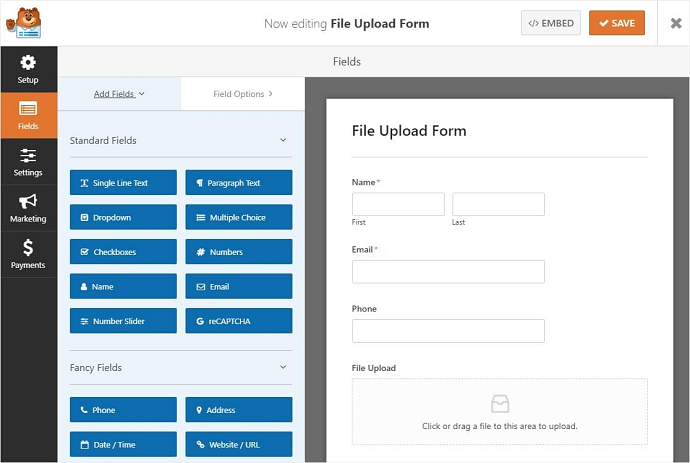
- Now you can view all fields associated with the pre-built Form Upload Template.
- Astonishingly, you can various fields along with the File Upload field like Name, Email, Phone, and Additional Comments.
- Here, all fields are just ‘drag & drop’ fields. So, you can easily re-arrange them in any order as you require.
- Further, you can add additional fields from the left pane, if you require.
That’s it! You have now learned how to create your own File Upload Form using the File Upload Form template.
Read It: How To Connect Stripe with Your Payment Form in just 2 Minutes
Step3: Add File Upload Feature To Any Of Your WordPress Contact Forms (An Alternate Way To Create Your Own File Upload Form)
You can also add the File Upload field feature to any of your WordPress contact forms. For details, just go through the following steps.
- Go to your WordPress Admin Dashboard. And click on WPForms. Then on Add New.
- Next, enter the name for your new form like a Simple Contact Form.
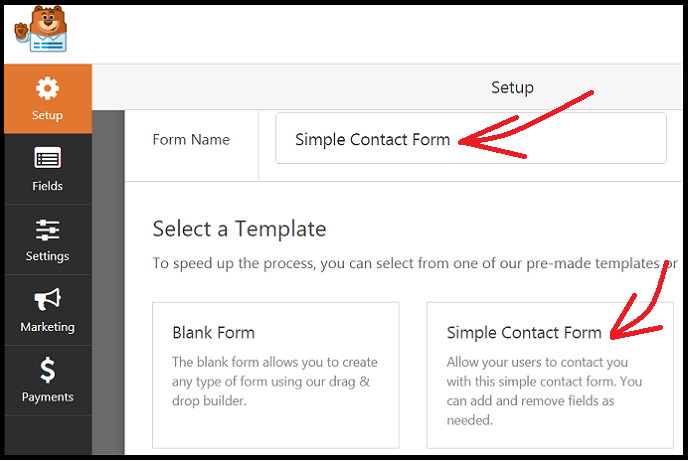
- Next, just below the Select a Template section, click on Simple Contact Form. Then a new Simple Contact Form is created with the following fields.
- Name.
- Email.
- Comment or Message.
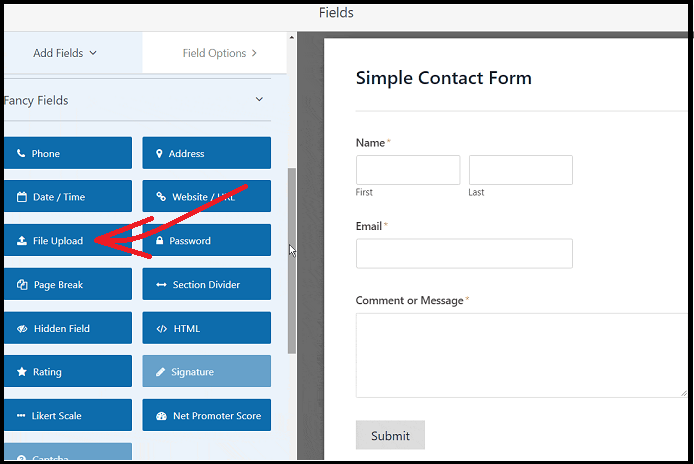
Next, drag the File Upload field present on the left-hand panel of the form editor and drop it on the right-hand panel.
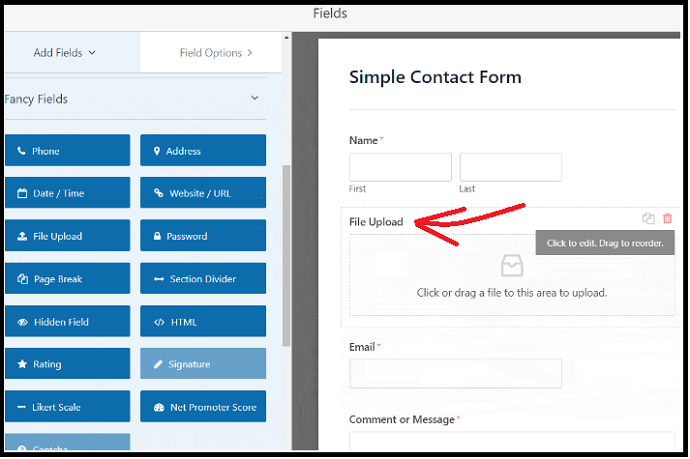
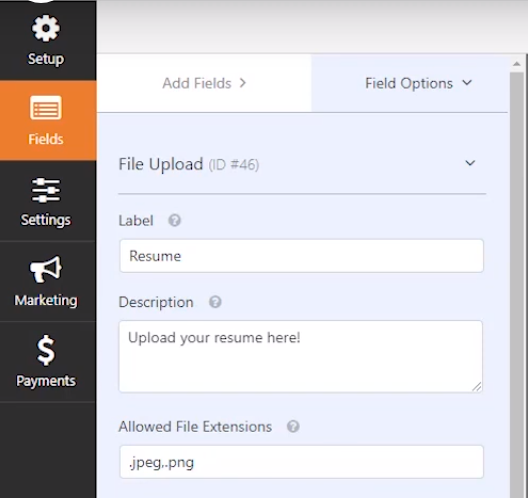
After adding the File Upload field to your form, then you can click on it to customize the following details related to it.
- Label:
- Name the form field like Resume so that your site visitors can understand what it’s for.
- Description:
- You can add a description like Upload your resume here! to provide more details about your form field.
- Allowed File Extensions:
- Tell your visitors which type of file formats are allowed to upload as .jpeg, .png.
- Max File Size:
- You can specify the maximum allowed file size in megabytes for uploading.
- By default, WPForms permits a maximum of 128MB.
- Required:
- Suppose, if any field in your form is to be filled compulsorily, then you can use this checkbox.
- Style:
- You can use the default Modern Style (recommended) or the classic style.
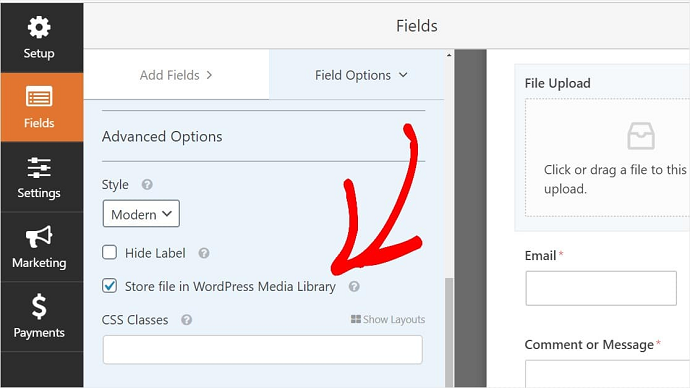
Where Are Uploaded Files Stored?
- At this point, you can think “Where all the files uploaded by visitors are stored?”. By default, all these files are stored in the WPForms folder inside the Uploads directory of your website.
- To make things easier, you can further store all these files in your WordPress Media Library by selecting the checkbox of the Store field in WordPress Media Library under Advanced Options.
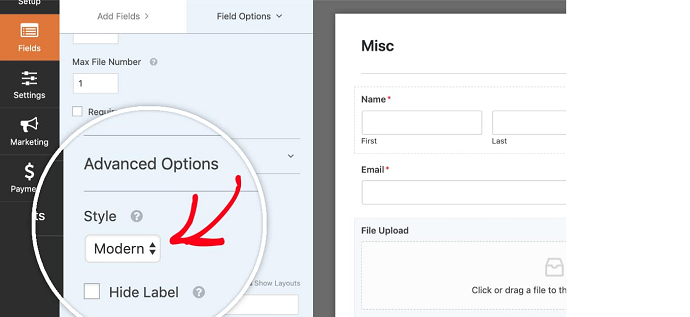
Step4: Choose Modern Style And Customize It
Now you have the two types of styles to choose for your form.
- Classic.
- Modern (Recommended).
Here, Modern style is recommended. Because it is easy for you to customize its fields. To choose Modern, go to Advanced Options and then select Modern under Style section.
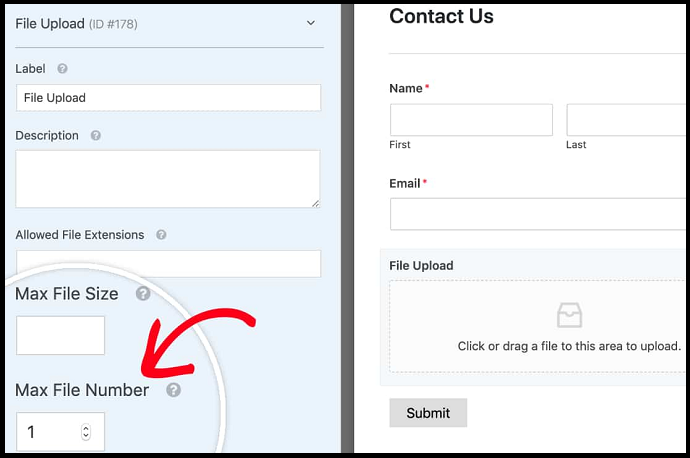
Can Users Upload Multiple Files?
- To allow your users to upload multiple files, first, you have to choose Modern style.
- Next, you can see a Max File Number option. By default, this field is set to 1. But you can increase this number to any value as you need. So that your visitors have the chance to upload multiple files.
Step 5: Configure the General Settings of Your File Upload Form
To configure the general settings of your File Upload Form, go to Settings >> General.
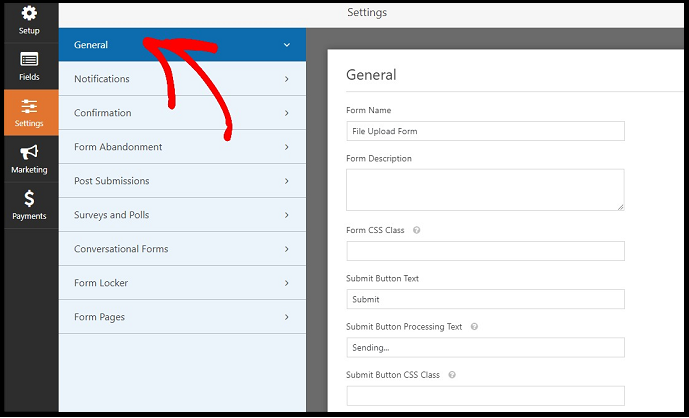
Here you have to configure the following fields.
- Form Name: You can use this option to rename your form if you want to.
- Form Description: Describe your form.
- Submit Button Text: Customize the form button copy.
- Spam Prevention: You must enable this option, to prevent spambot submissions.
- GDPR Enhancements: To obey GDPR laws, you have to disable the storing of entry information and user details like IP addresses and user agents.
After configuring the General Settings, next click on the Save button.
Step6: Configure Notifications for Your File Upload Form To Get Email Notifications
- Next, you have to configure Notifications to get Email Notifications whenever someone submits your File Upload Form.
- To configure ‘Notifications‘, go to Settings >> Notifications.
- Next, you can view On option under the Notifications section. That is, by default, the notifications option is enabled for your form.
- Suppose, if you don’t prefer to receive Email Notifications, then you can toggle this option to Off also.
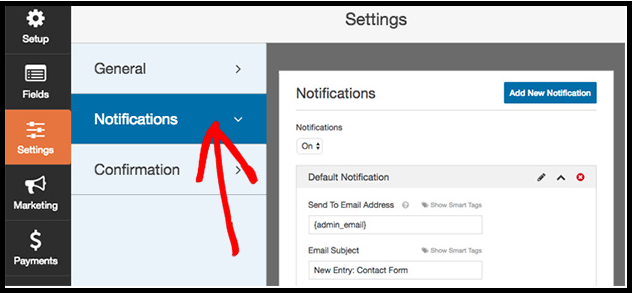
Next, you can easily configure the remaining Notifications options like:
- Send To Email Address.
- CC.
- Email Subject.
- And more.
Step7: Set Up Your File Upload Form’s Confirmation
Form Confirmations are great ways to convey Heartful Messages like ‘Thank You for submitting the form’ and more to your users immediately when they submit forms to you.
With WPForms, you can choose three different kinds of confirmations to set up:
- Message:
- You can choose this confirmation type to display ‘Thank You For Submitting The Form And Your Form is Processed Successfully‘. If you want, you can customize this confirmation type too to boost your site visitors’ happiness.
- Display:
- You can choose this confirmation type to automatically send your site visitors to any webpage on your site like Thank You page.
- Redirect:
- You can use this confirmation type if you want to redirect your site visitors to a different website.
Now let’s see how to set up a confirmation type for your form. To start, just go to the Settings in your form editor and click on the Confirmation tab.
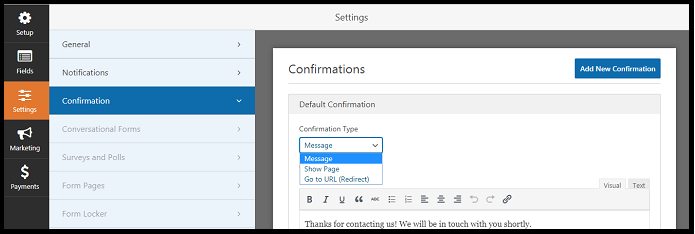
Next, choose any confirmation type like Message, Show Page, or Go To URL. And customize the confirmation type that you have selected. Then click on Save.
That’s It! You are now ready to add your form to your website.
Recommended: 5 Best Contact Form Plugins for WordPress
Step8: Publish Your File Upload Form on Your Website
WPForms permits you to add your File Upload Form to any page or anywhere on your website like in your pages, blog posts, and sidebar widgets.
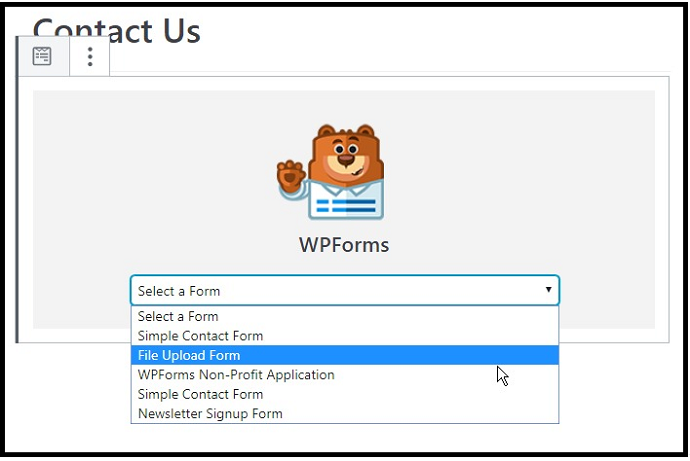
Now let’s see how to publish your upload form in posts or pages. To start, create a new post or page in your WordPress site. Next, click inside the first block (the blank area just below your page title). And click on the Add WPForms Icon.
Now, the WPForms widget appears inside your block. Then click on the WPForms dropdown and select the form that you have created now. That is the File Upload Form.
Next, click on the Publish or Update buttons in the top right. Then your File Upload Form appears on your website.
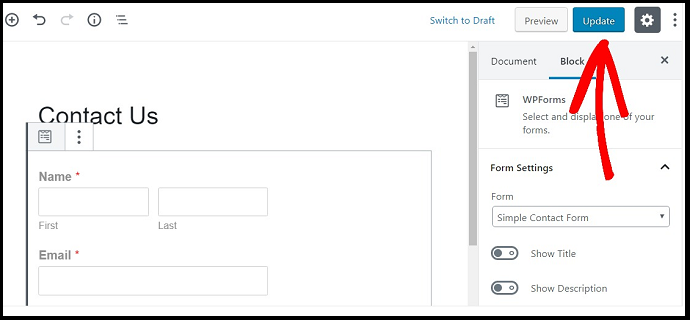
That’s It! You have now published your File Upload Form on your website. And this form now appears on your website.
Step9: View The Uploaded Files On Your Website
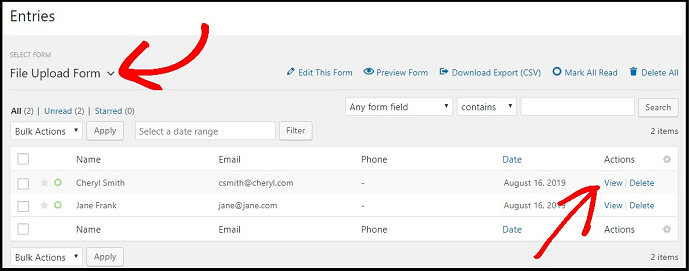
- WPForms stores ‘every form submission’ as an entry. To view the uploaded files, go to your WordPress site dashboard.
- Next, on the left-hand panel side click on WPForms. Then on Entries.
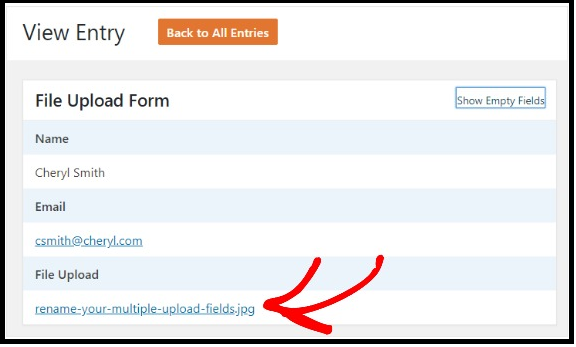
- Next, choose the correct file from the dropdown menu like File Upload Form. And click on View.
Next, right-click the file to download it, or click it to view it on your browser.
Final Thoughts On Creating File Upload Forms Using WPForms
You have now learned how to easily create a File Upload Form in WordPress using WPForms. And you have also seen how to view the form submissions sent by your site visitors.
At last, we must say Thanks to WPForms for making the complex task of creating the File Upload Forms in WordPress easy. And File Upload Form is a great way to allow your visitors to directly upload file attachments to your WordPress forms.
So, don’t wait. Let’s start using the WPForms Pro as it offers a free file upload feature and file upload form and a 14-day money-back guarantee.
- Read Next: How To Create An Order form in WordPress With or Without Payment Option
- How to Set Up WordPress Email Logs
I hope that this article can definitely aid you to easily create a File Upload Form in WordPress using the WPForms plugin. If you like this article, do a favor by sharing this article and follow BlogVwant on Facebook and Twitter for more tips.
WordPress File Upload Forms FAQs
How do I let someone upload files to my site?
Using WPForms, you can easily permit your site visitors to directly upload files to your WordPress site. For complete details, go through the step by step procedure explained in this article.
What File Types are Allowed for Upload?
Security is a huge priority at WPForms. So it restricts file types to safe files only (the same file types permitted by WordPress core). They are:
Images such as .png, .gif, .jpg
Documents like .doc, .xls, .ppt, .pdf
Audio like .wav, .mp3, .mp4
Video like .mpg, .mov, .wmv
What is the Maximum File Size Allowed for Uploads?
By default, WPForms permits a maximum of 128MB.
How Do Notifications Work With File Uploads?
When your user submits a form with an upload file, then you will receive an email notification with a link of that file. By this, you can quickly view or download the file using the link without logging into your WordPress dashboard.